
In many cases, you may find that your existing eCommerce flow works perfectly out of the box for your Cloudshelves. If however you want to take advantage of advanced features for allowing instant card payment, or to create express in-store fulfilment, then you will want to customise the checkout process.
As always, this can be done without writing any code.
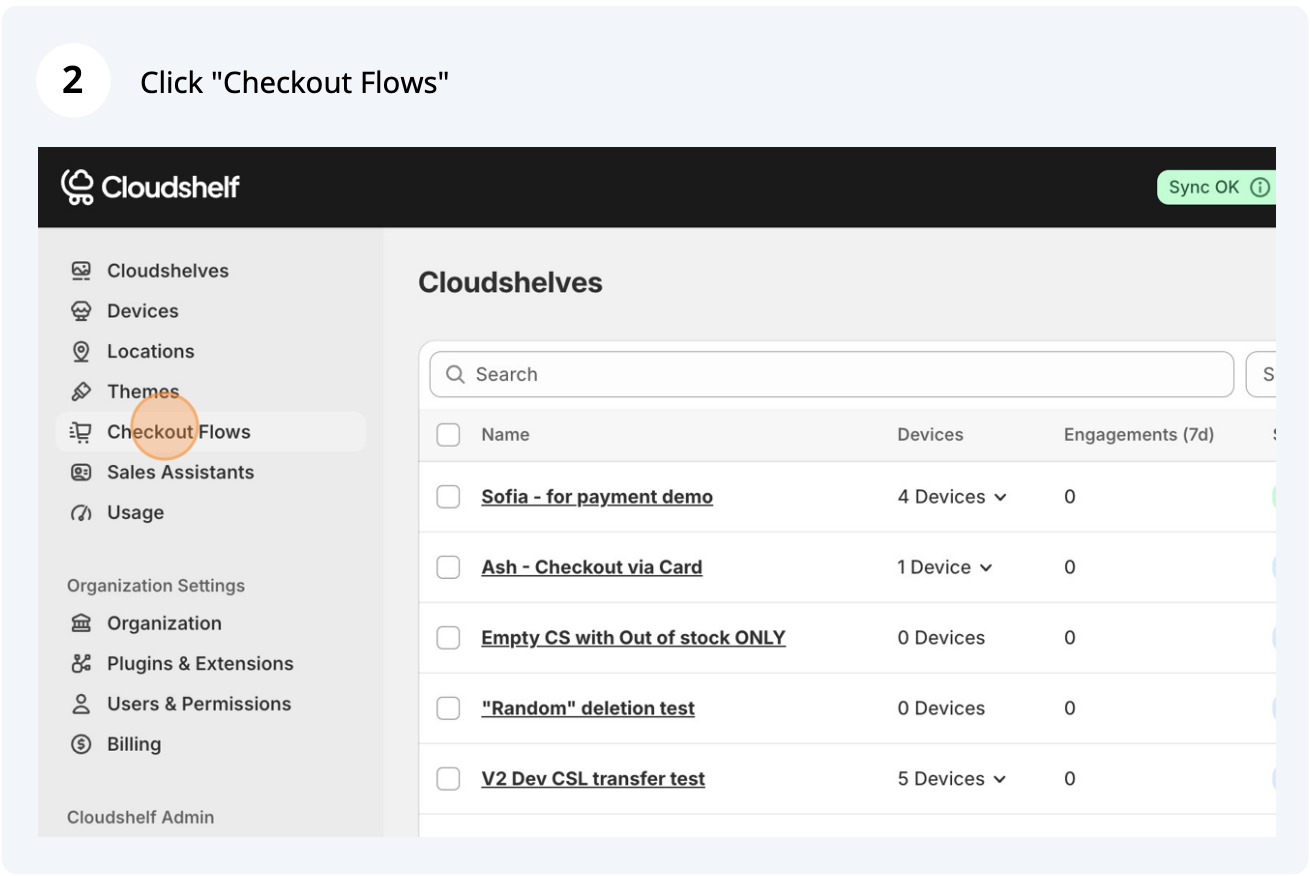
Below are the steps to configure your custom checkout through the Cloudshelf app.
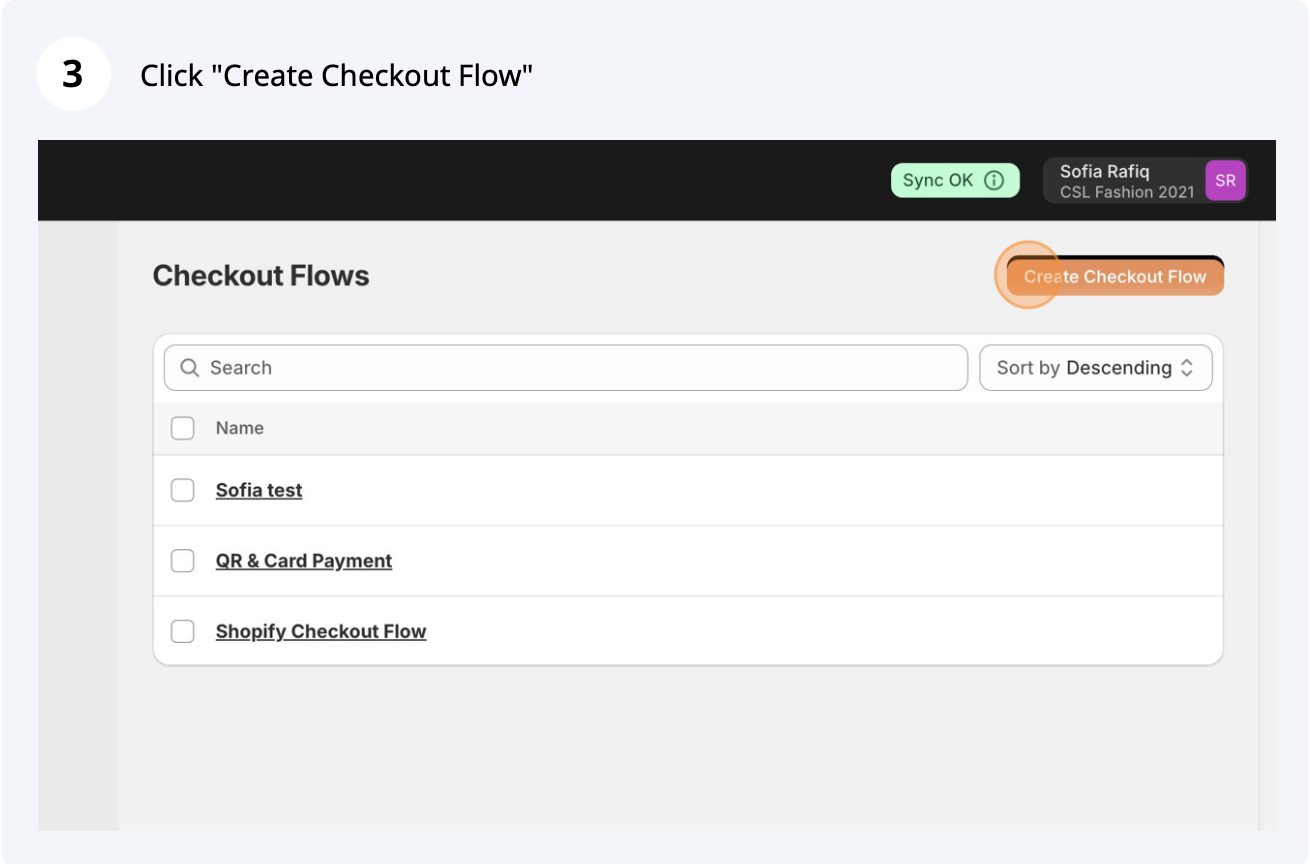
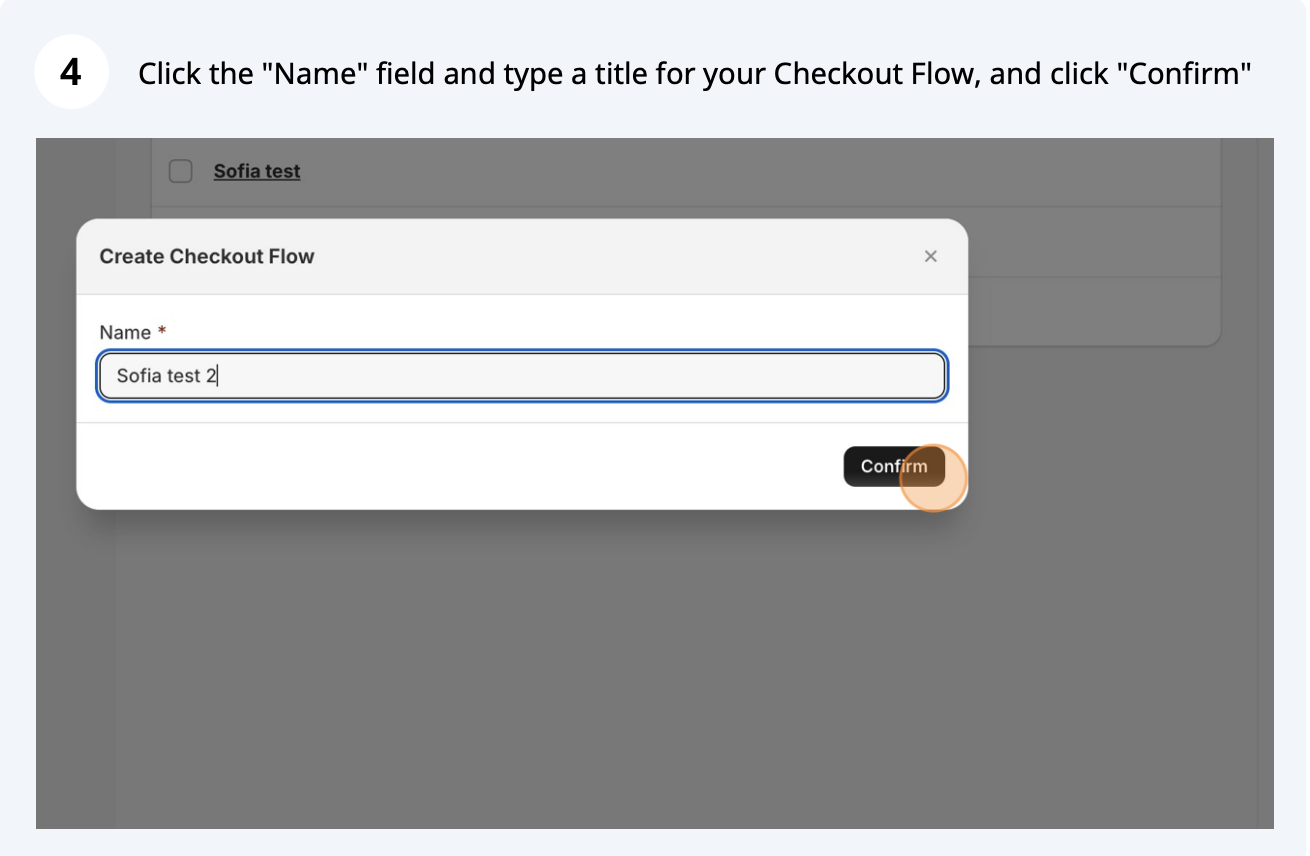
Create your checkout flow
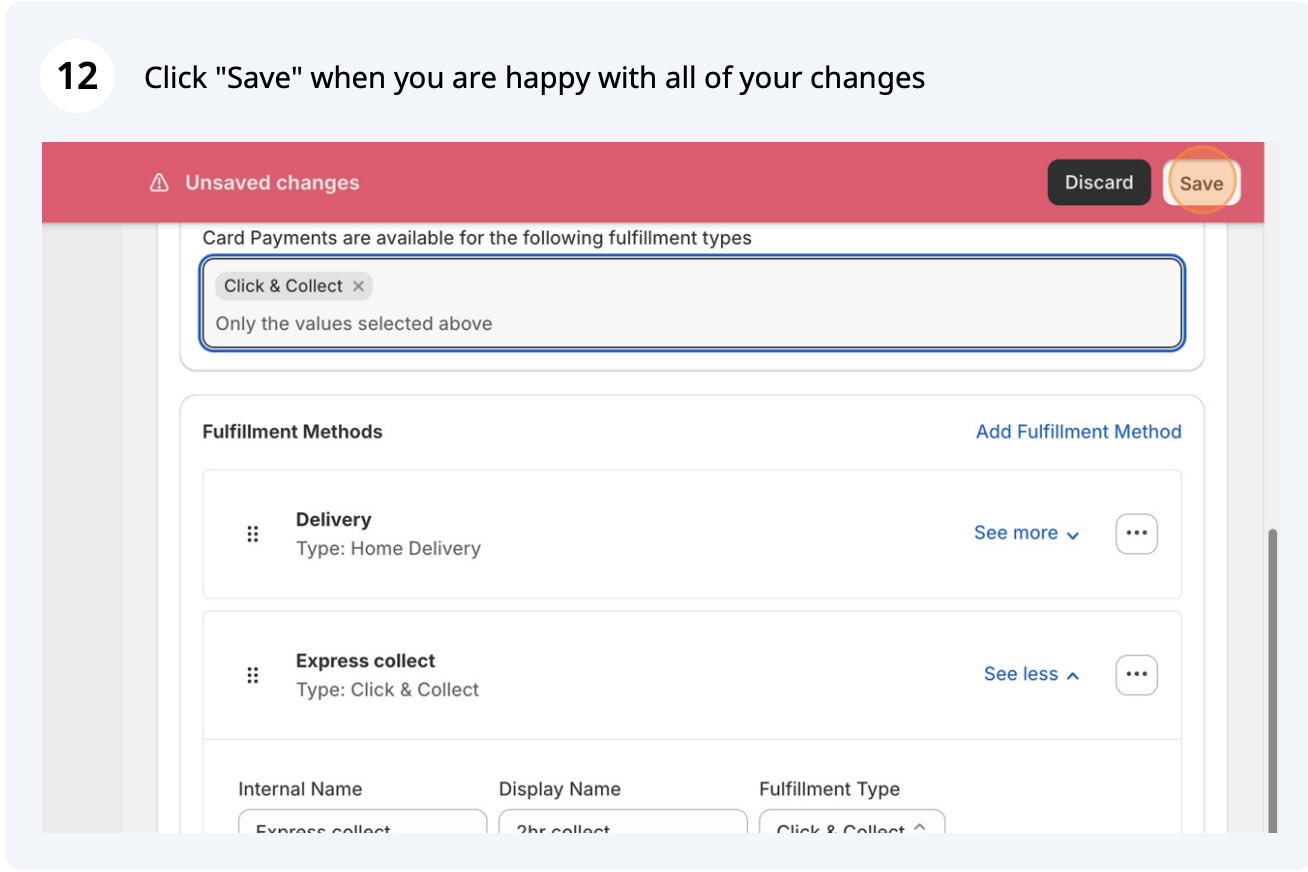
The checkout flow covers the experience from what payment methods you accept and how you want to fulfil orders created in a store.

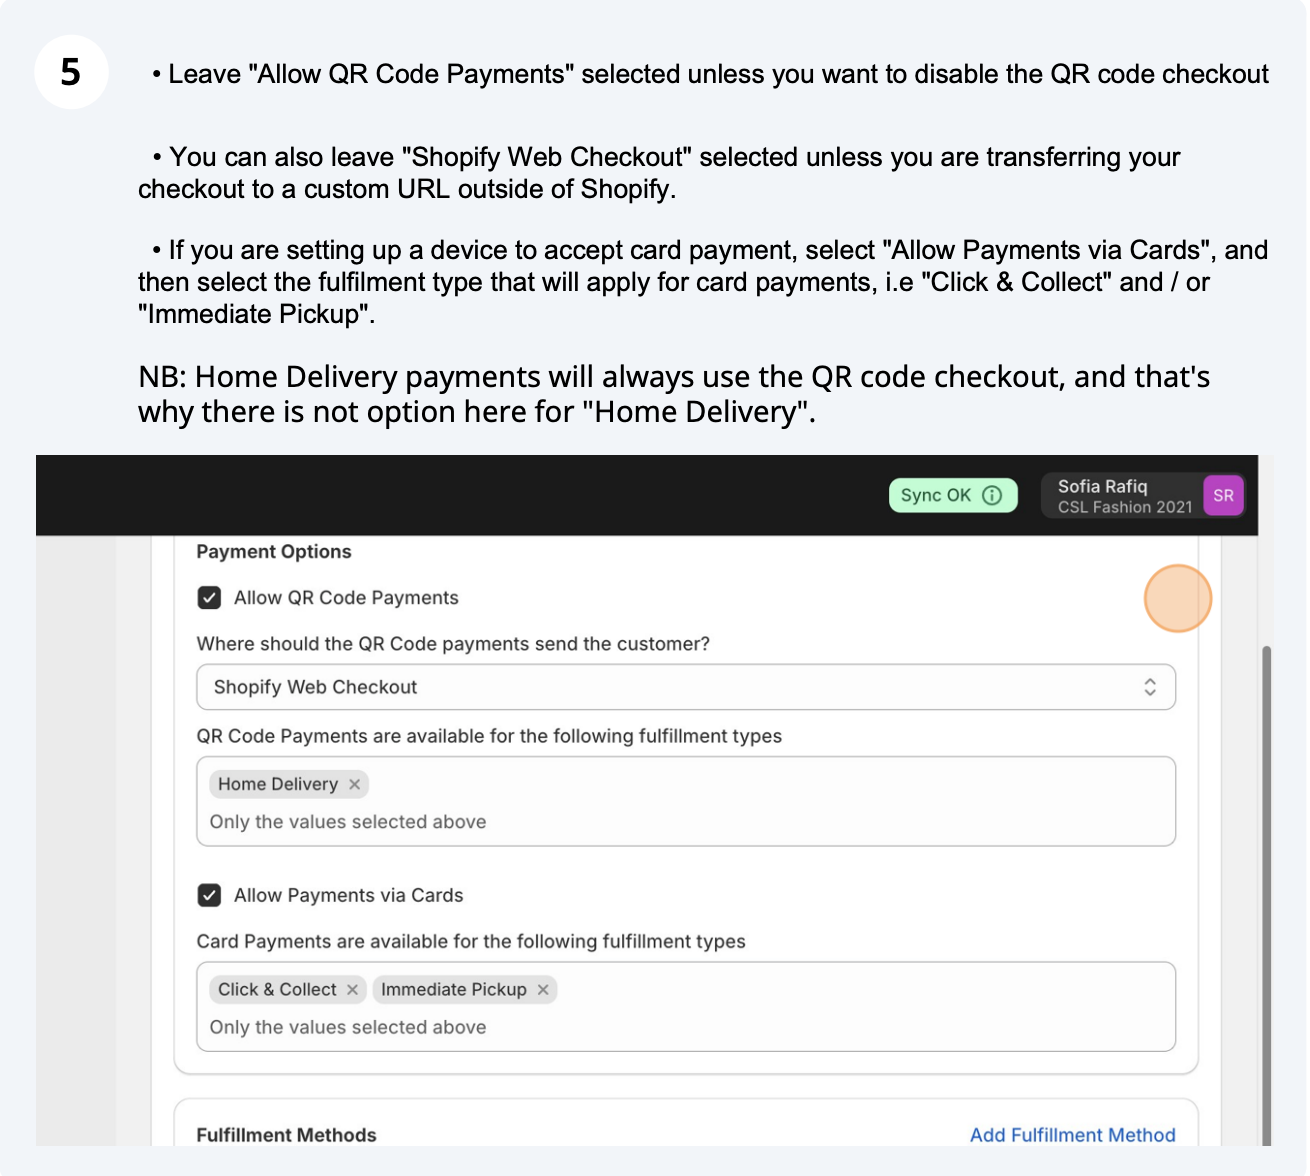
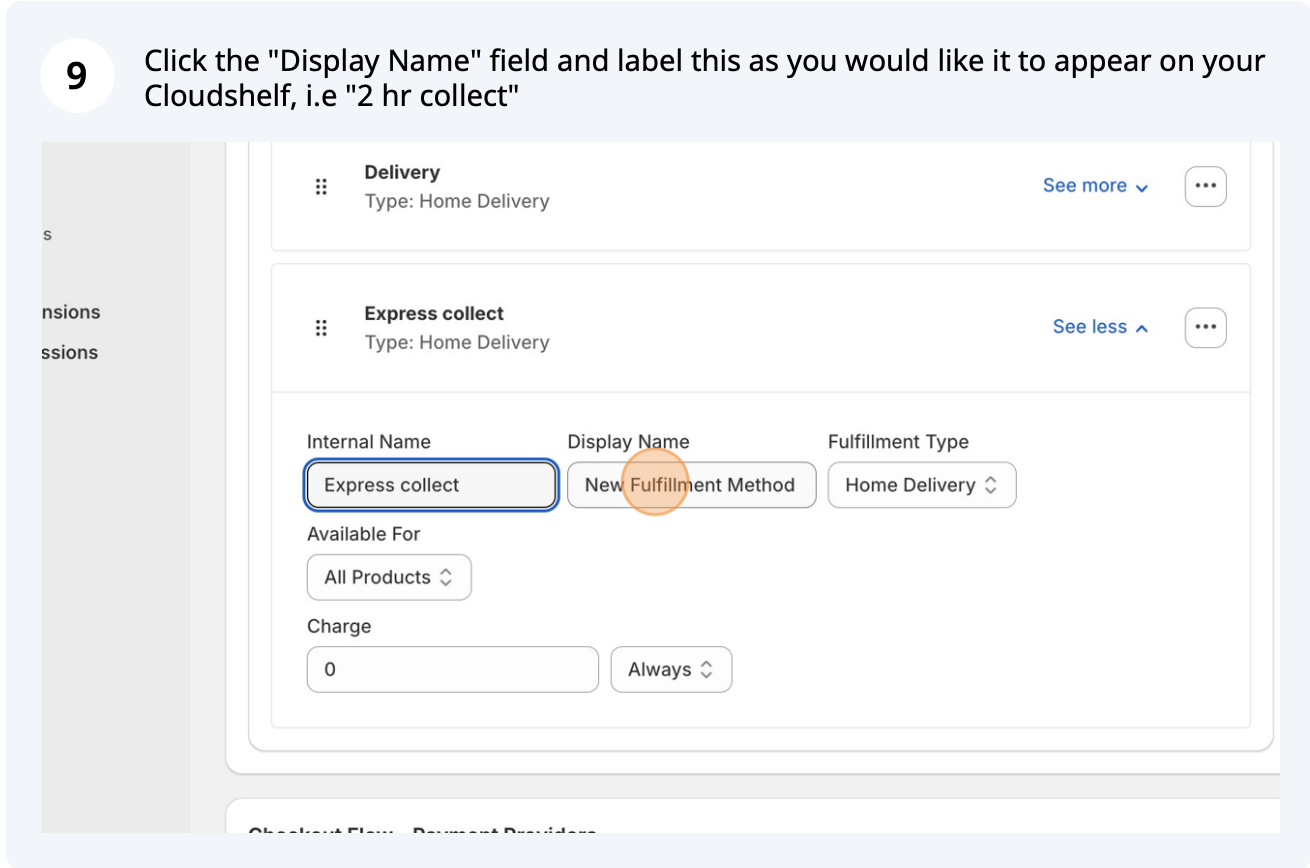
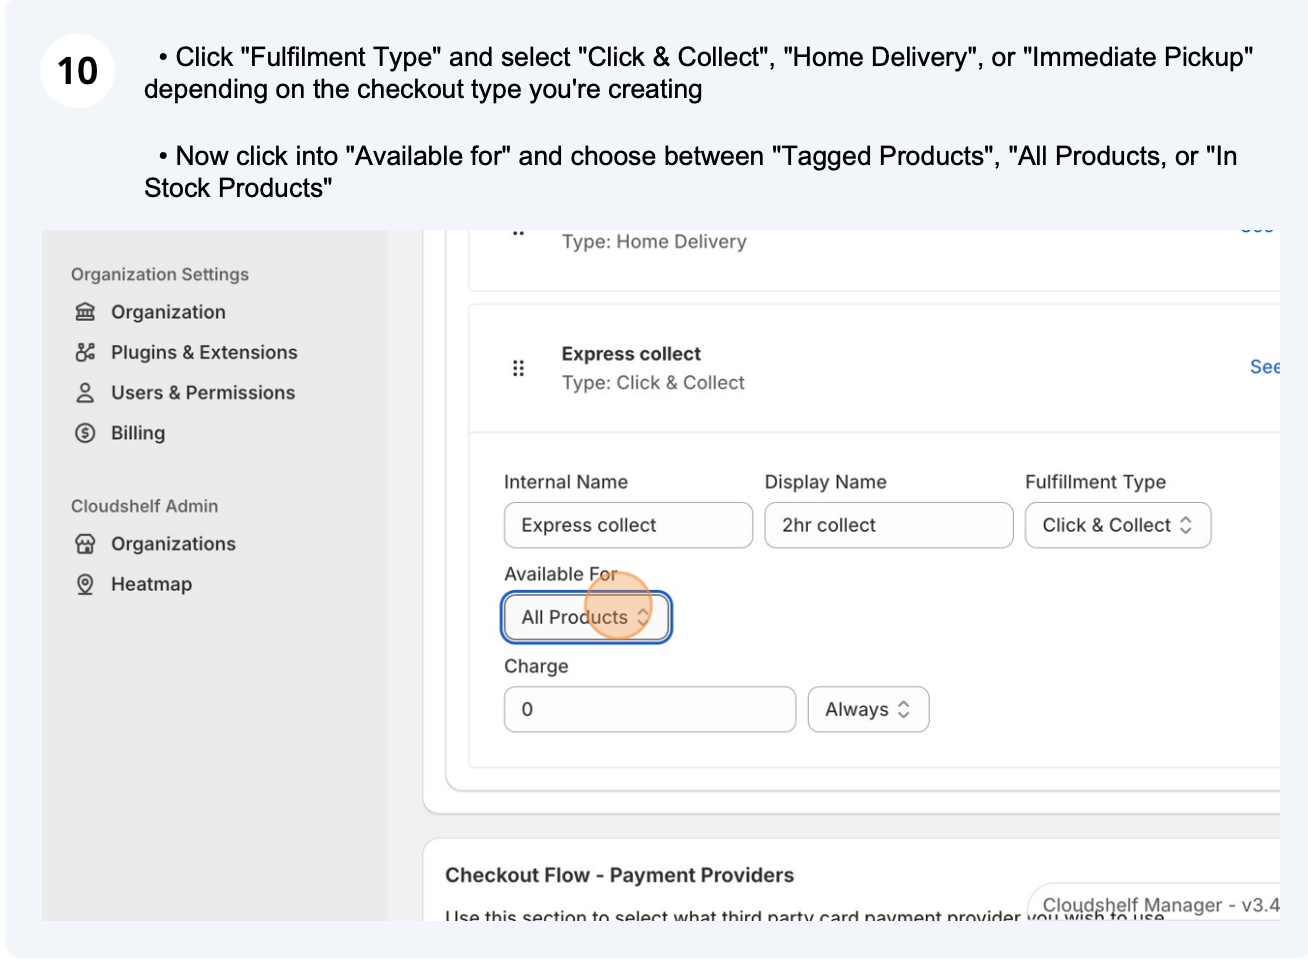
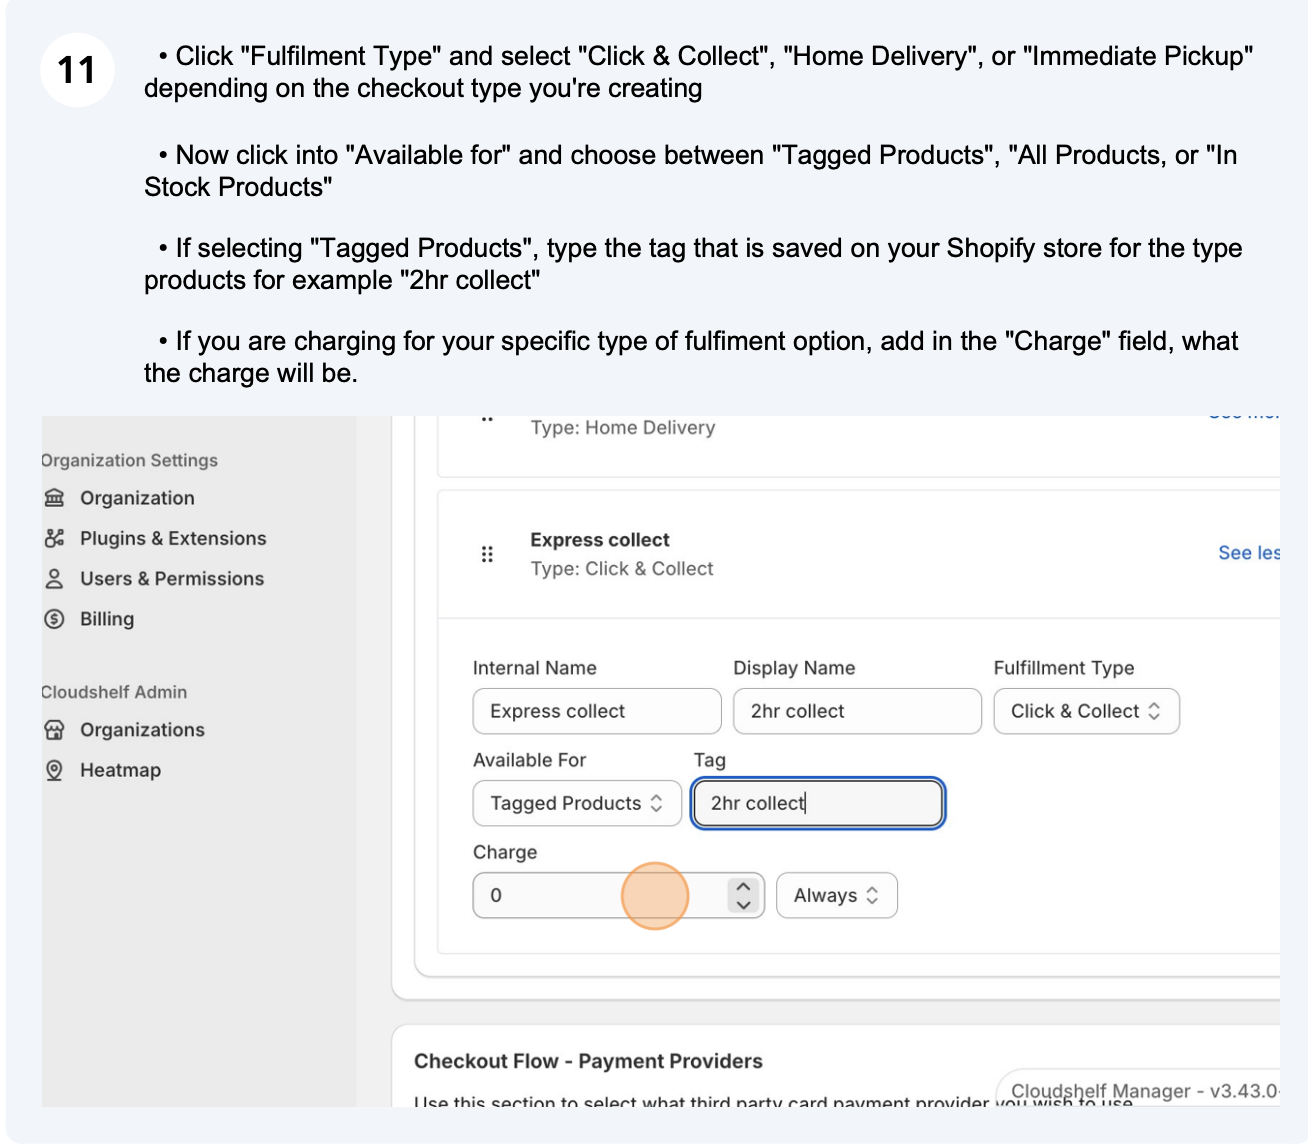
Configure your fulfilment method
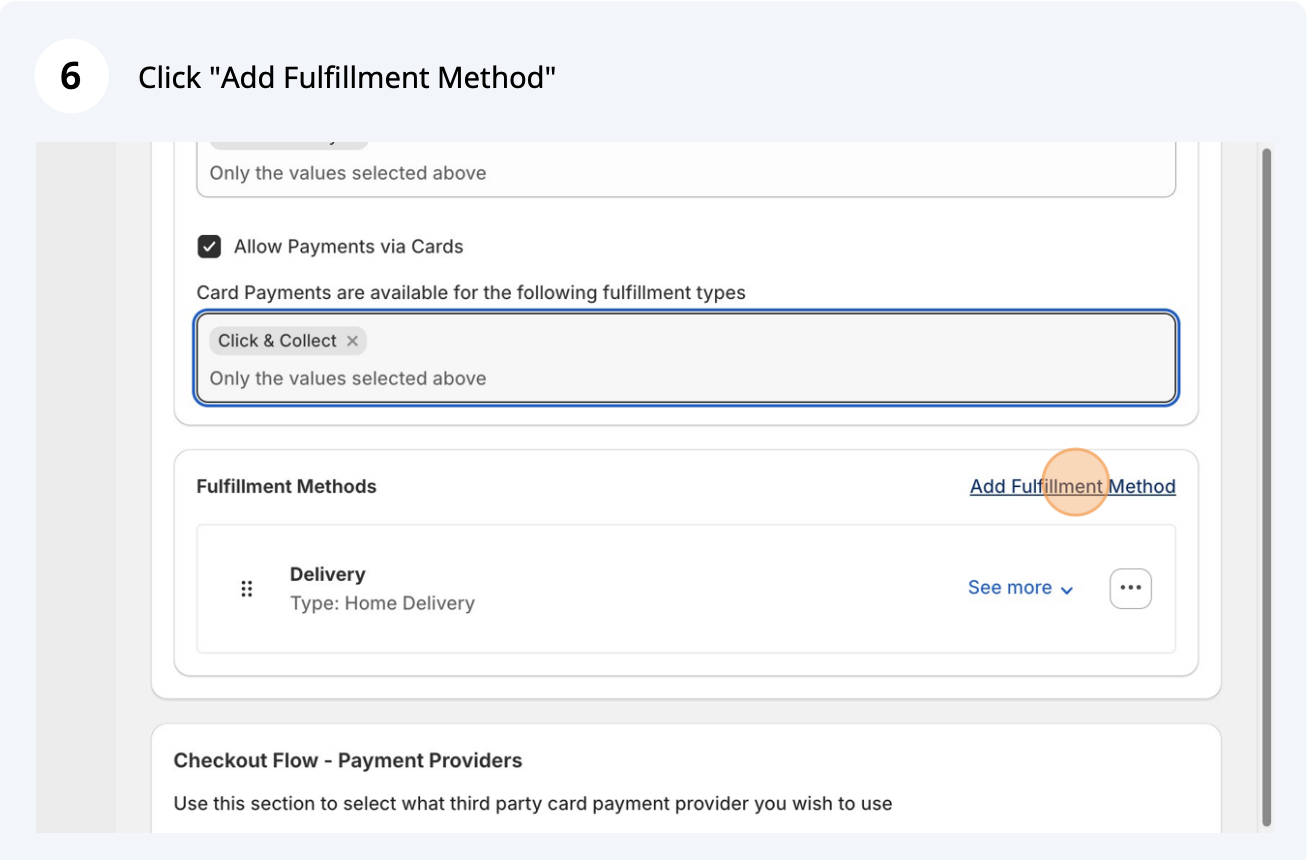
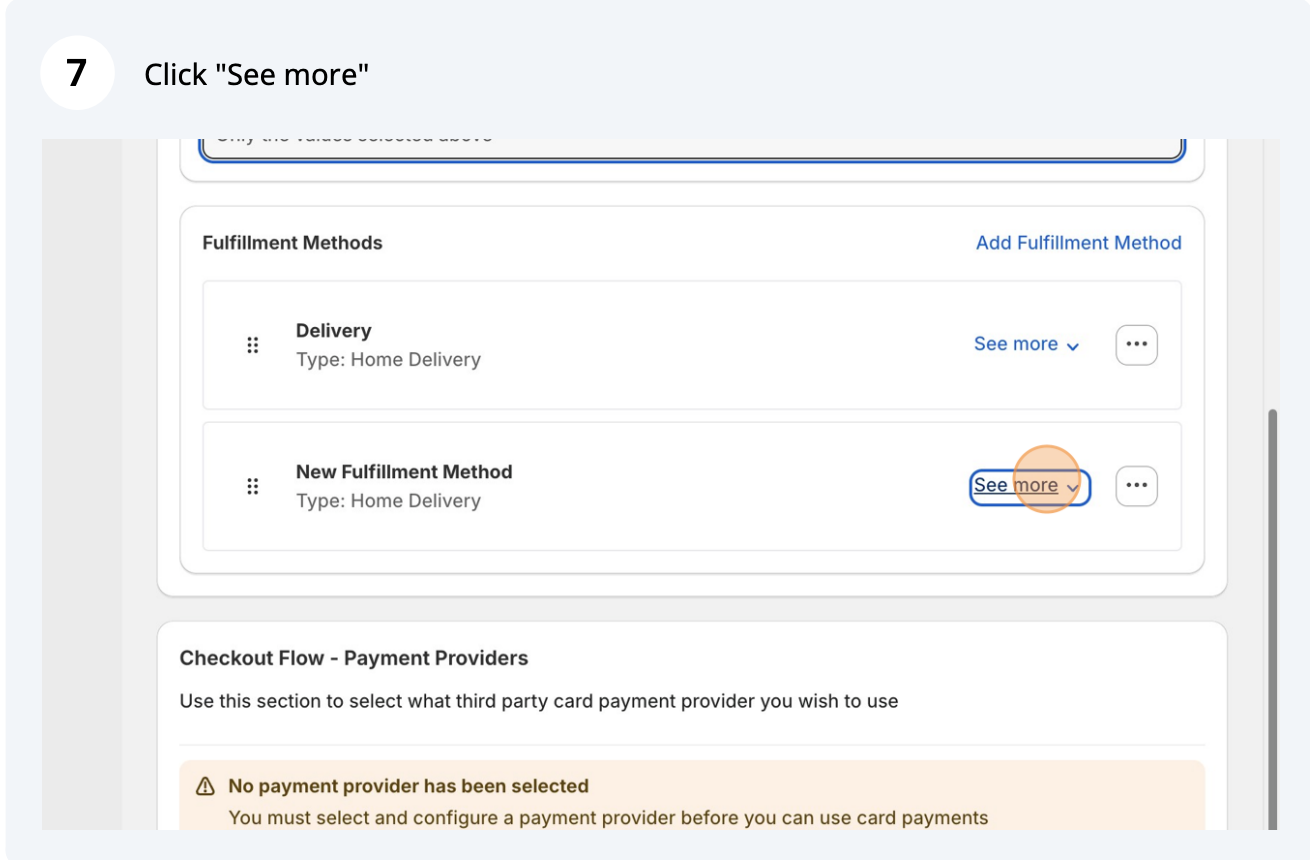
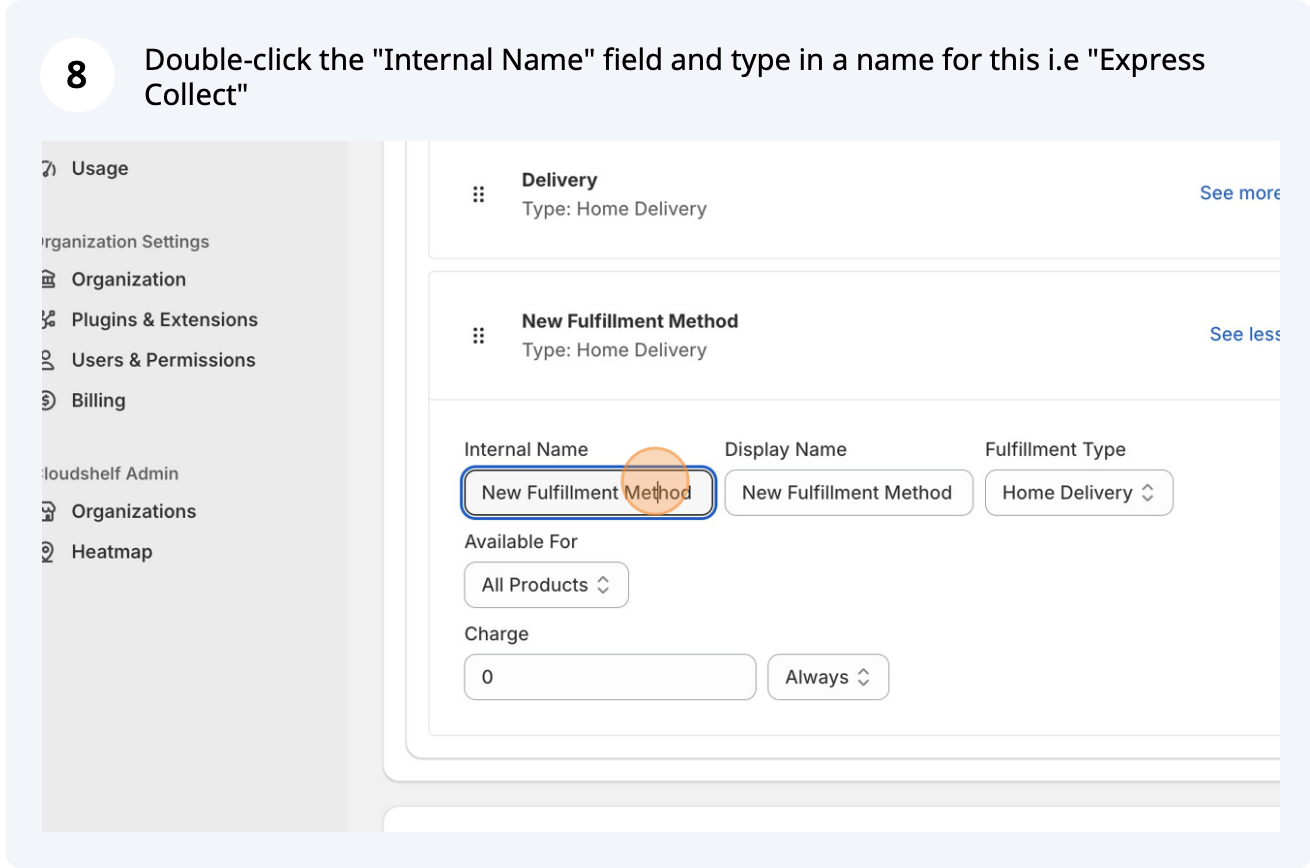
Fulfilment methods cover 3 main types: delivery, where the item is shipped using your existing eCommerce flow; in-store collection, where the item needs to be collected at a future time from the store in which the order is placed; and pick-up and go, where the item was likely scanned (and therefore in hand) and needs to be removed from the stock of the store in which the purchase took place.
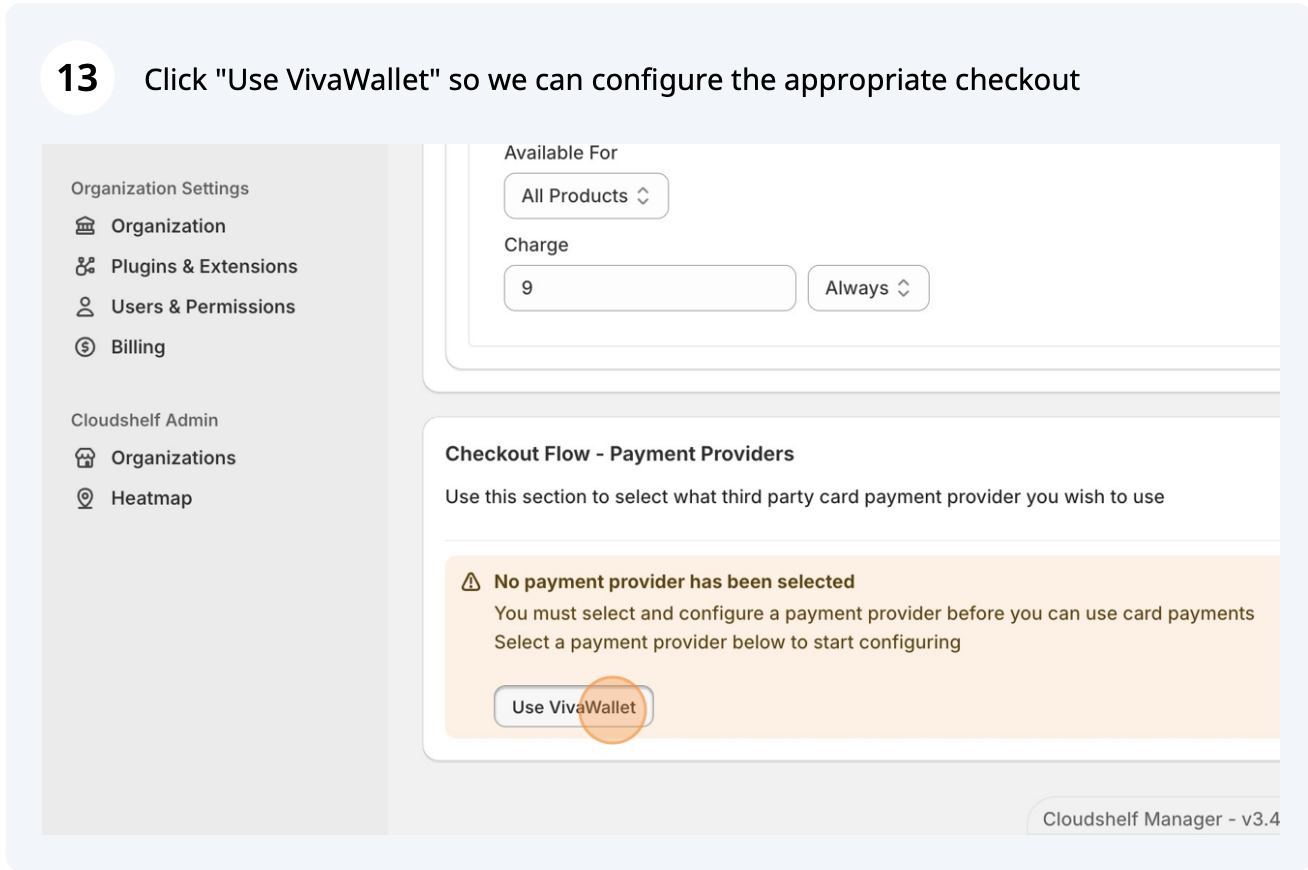
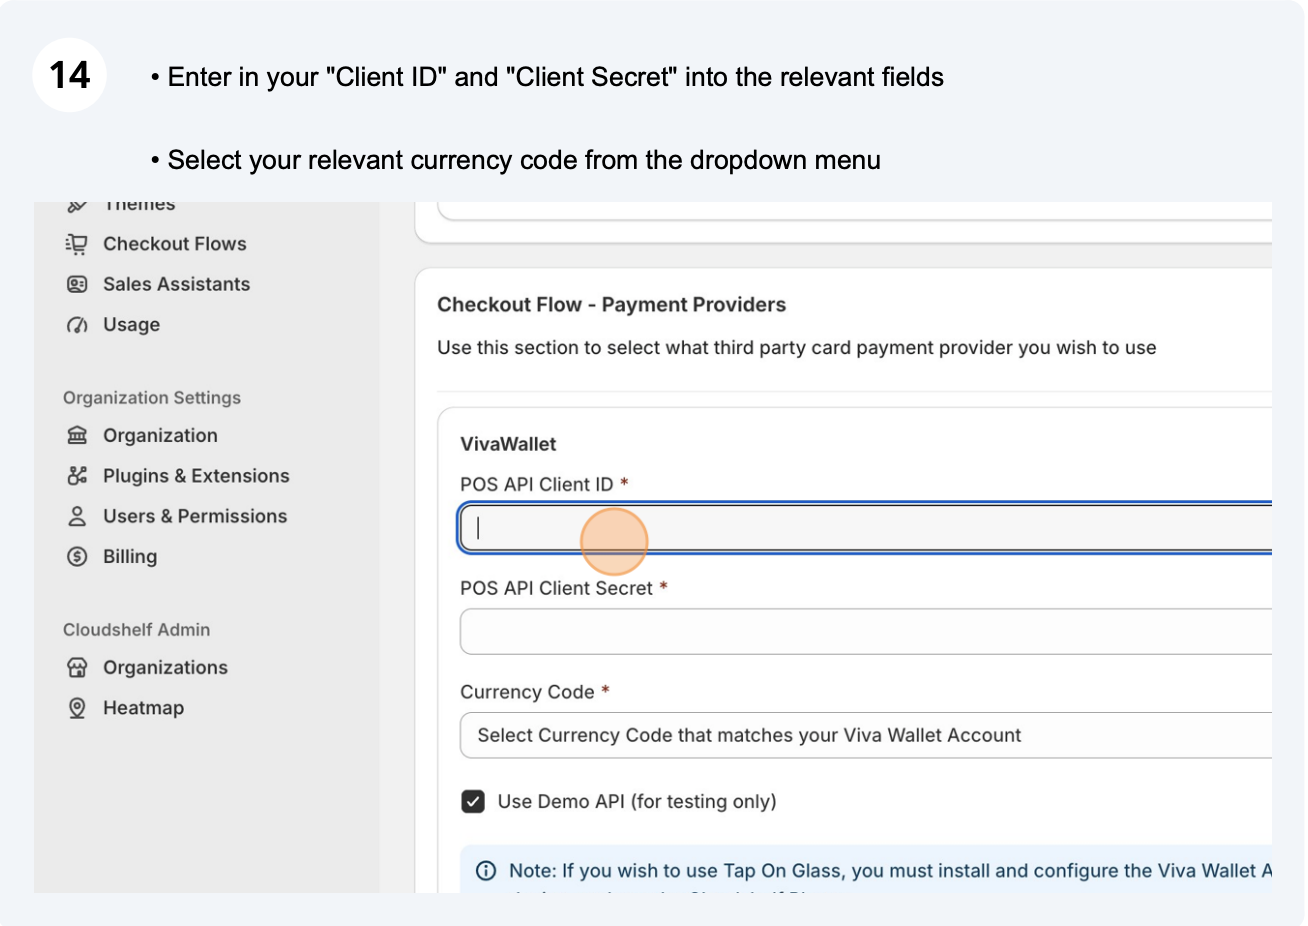
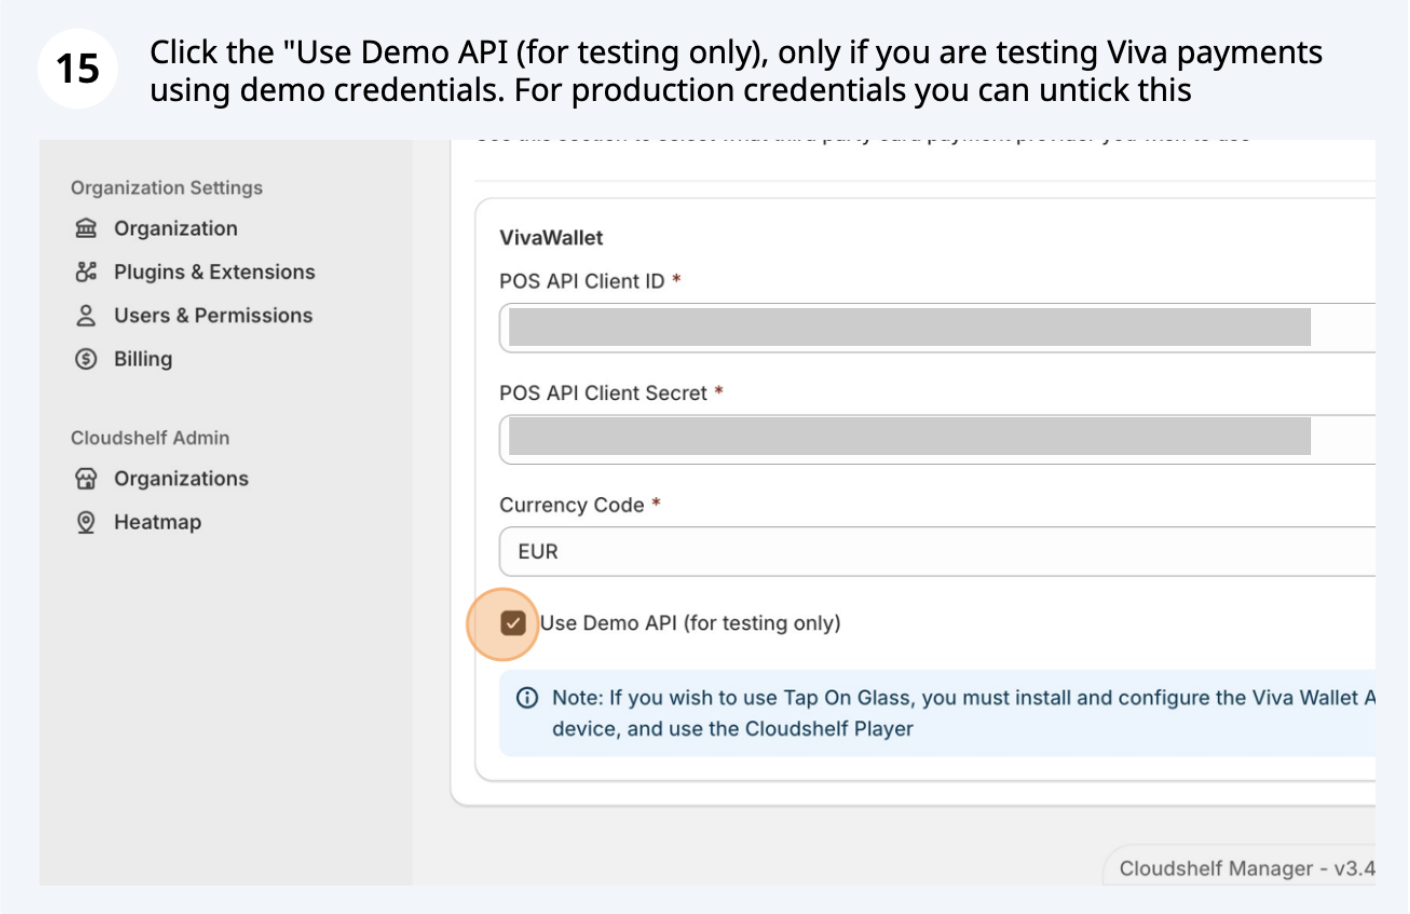
Add your Viva credentials to set up your Viva checkout
For now, payments are either via your eCommerce solution or via Viva. In due course we will be adding more payment providers.
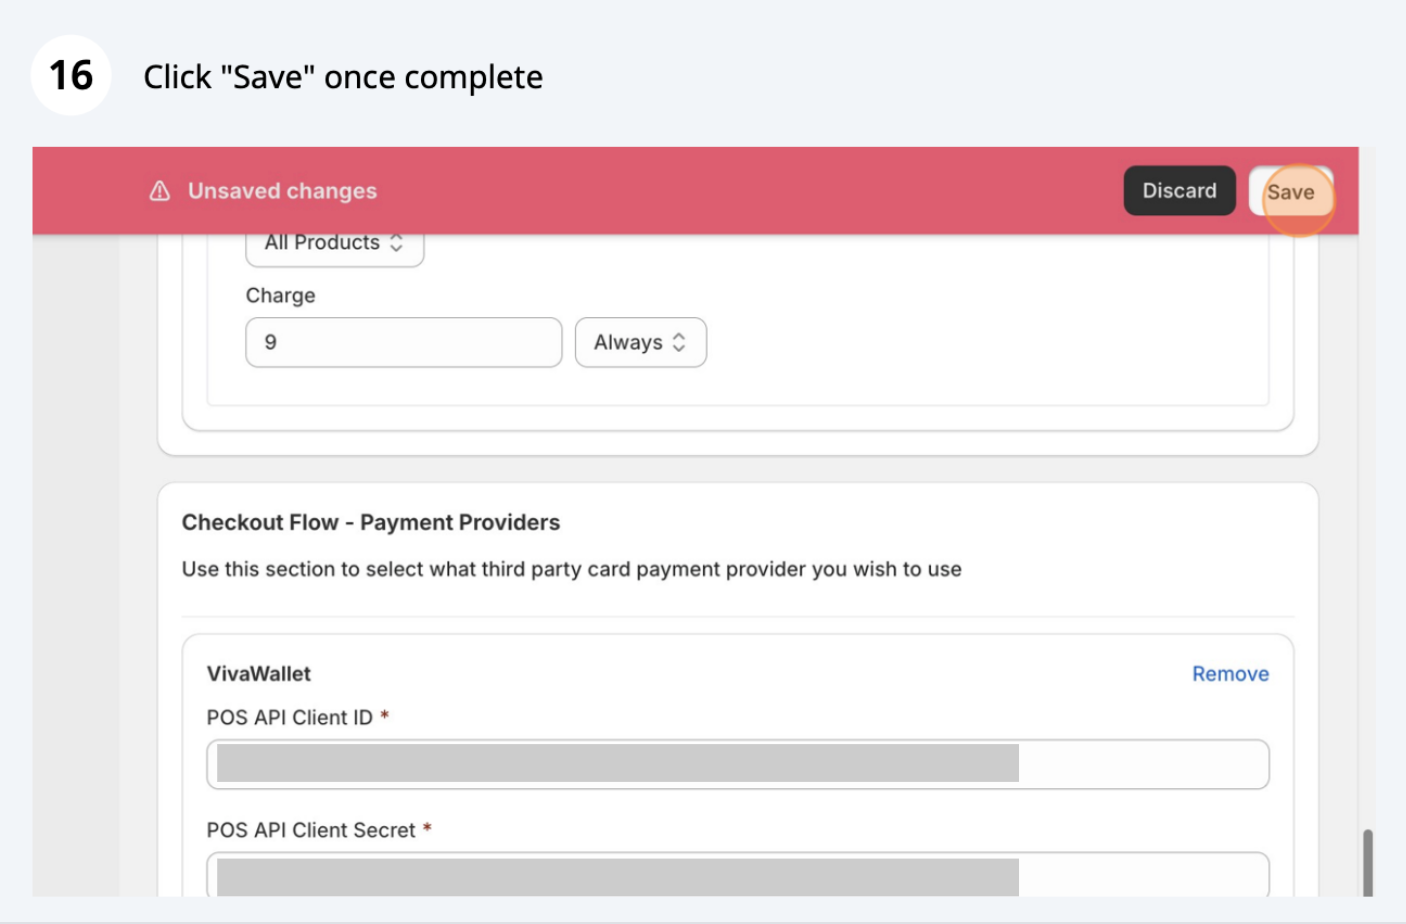
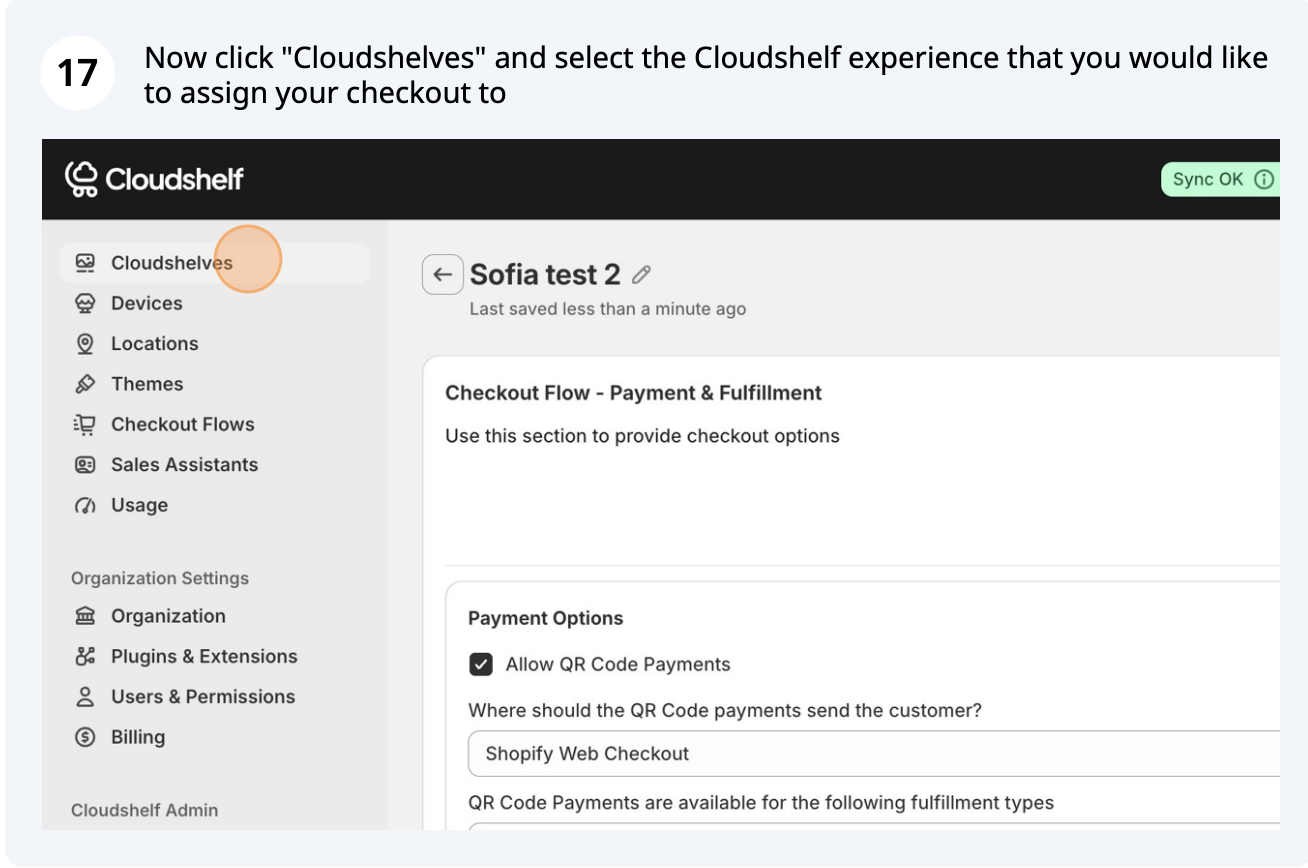
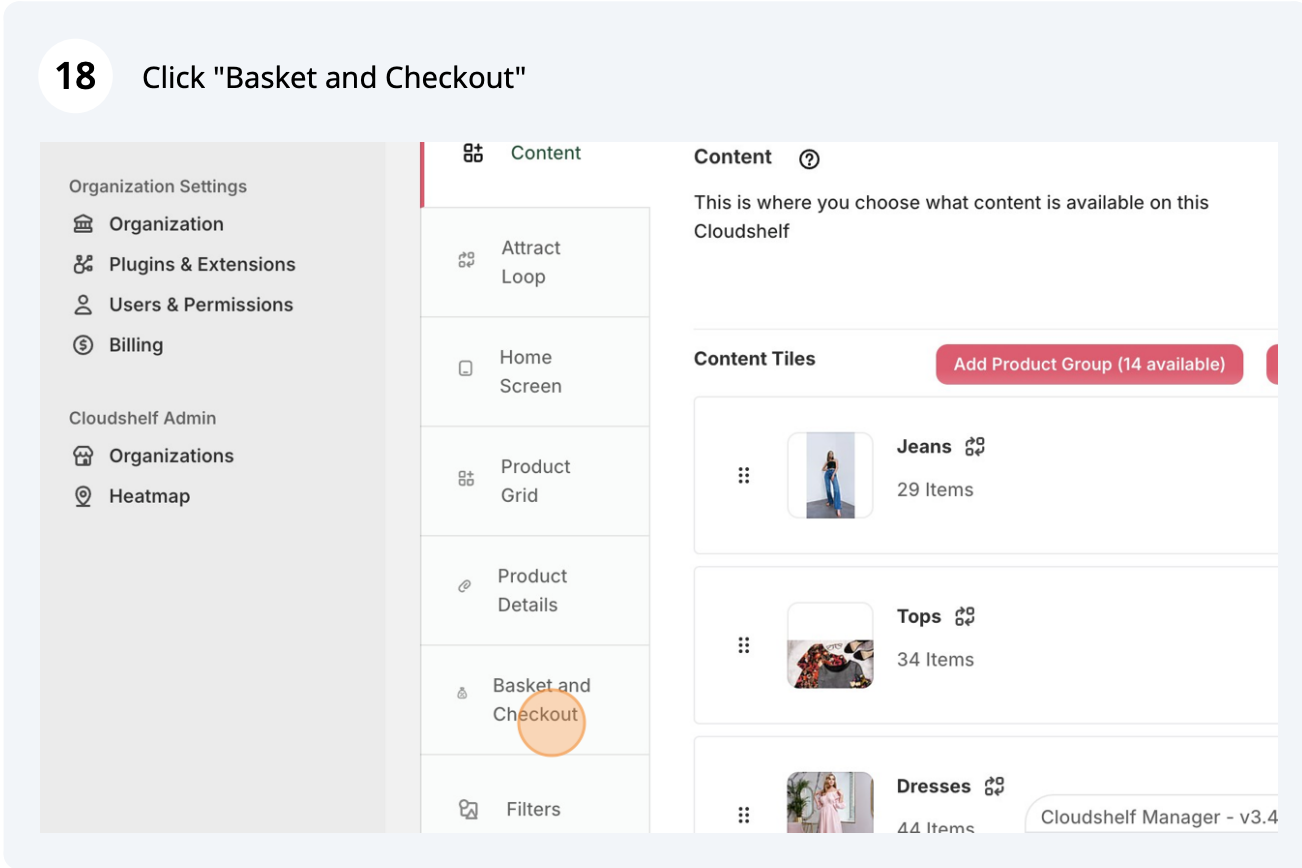
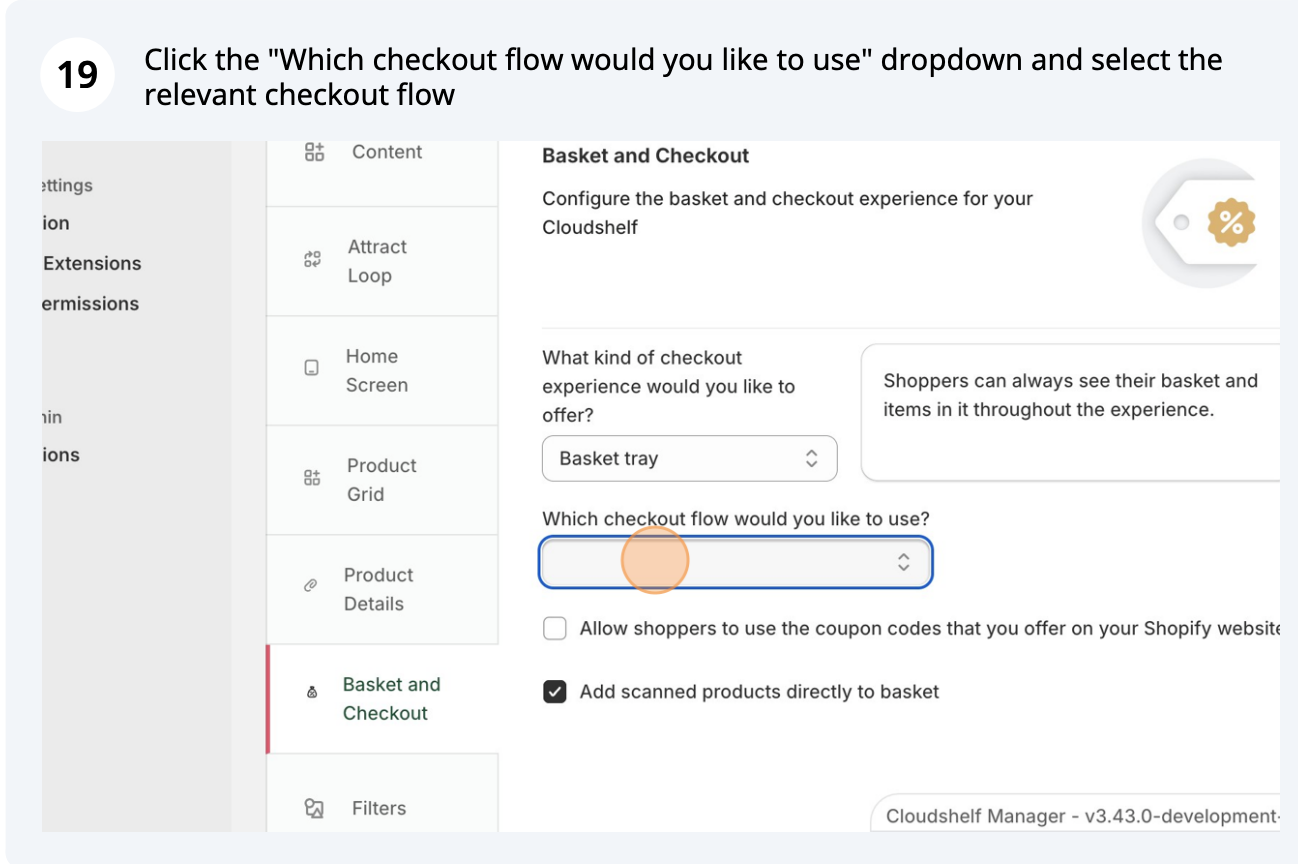
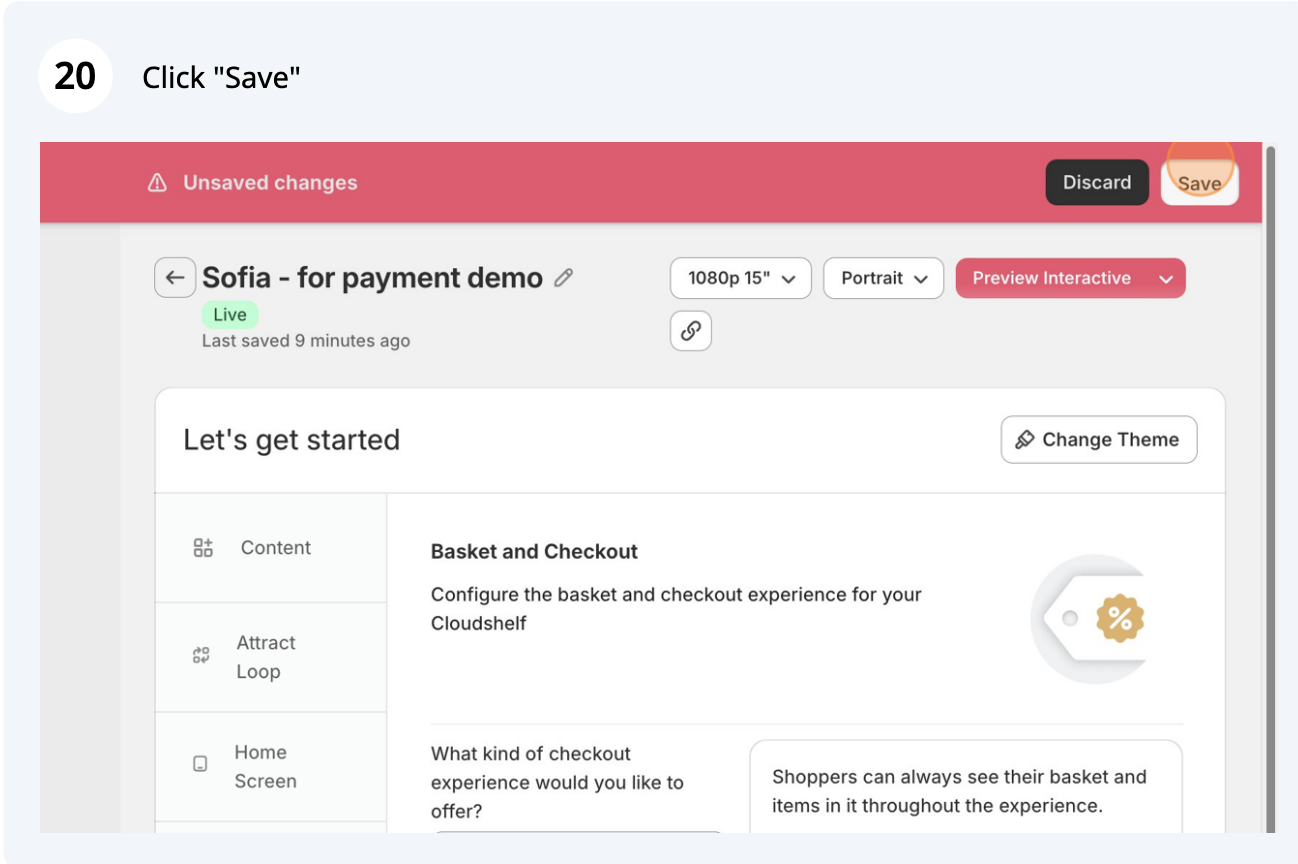
All the background creation of the checkout flow is now complete. You need to assign it to the appropriate Cloudshelf.
Assign your checkout flow to your Cloudshelf
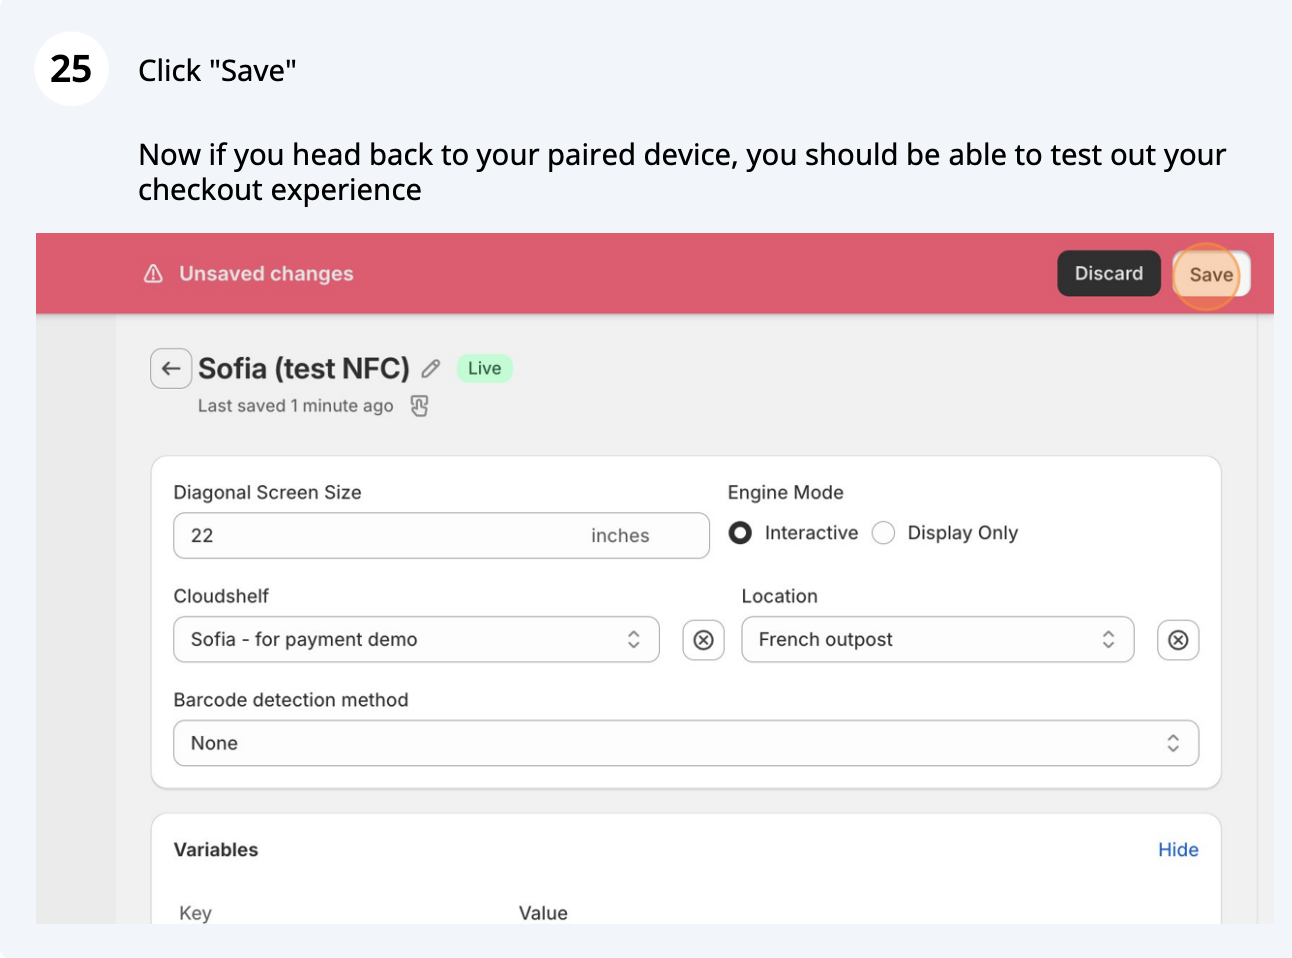
If you are not setting up a physical card payment terminal and are using Viva's tap-to-pay feature, you can finish here and head to your device to try out your new checkout. If you are setting up a payment terminal, carry on to the next section.
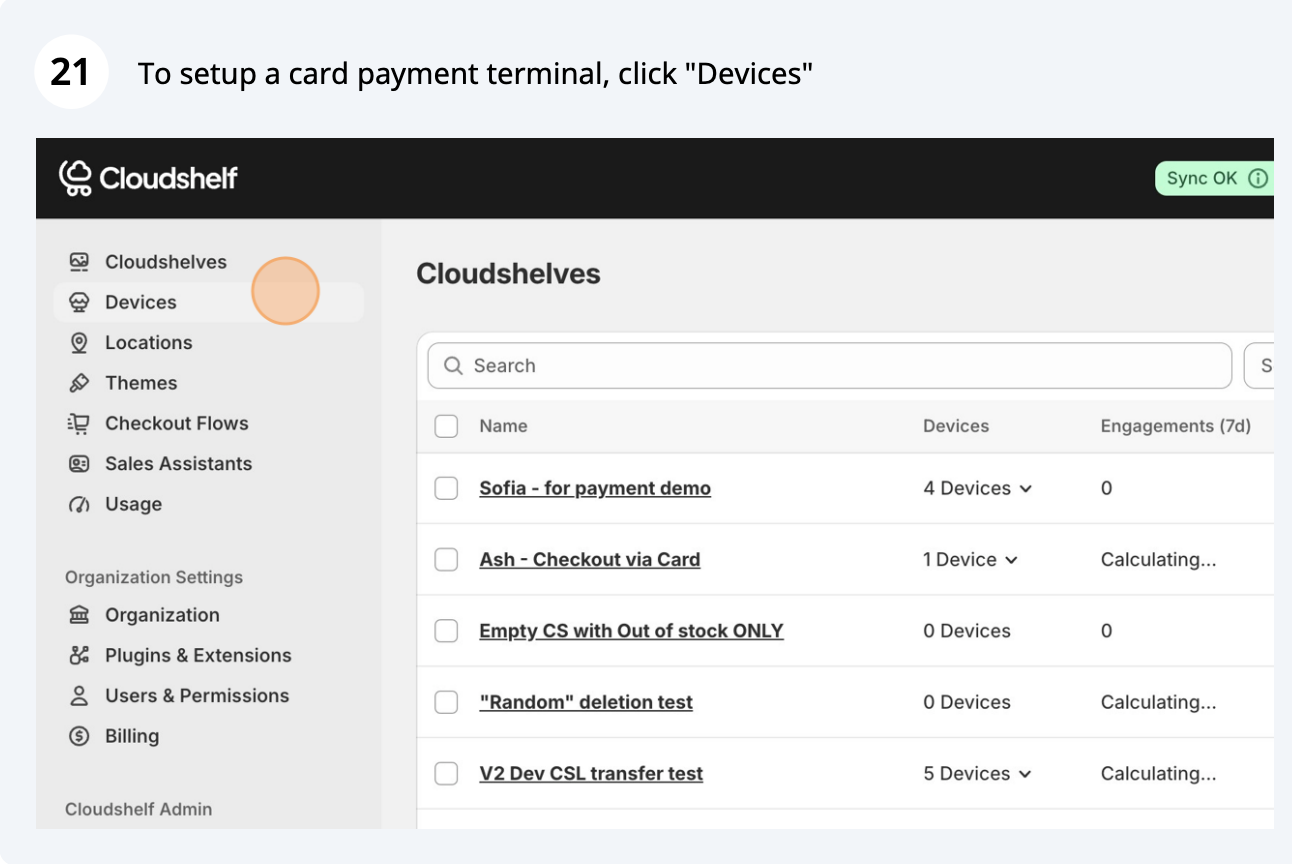
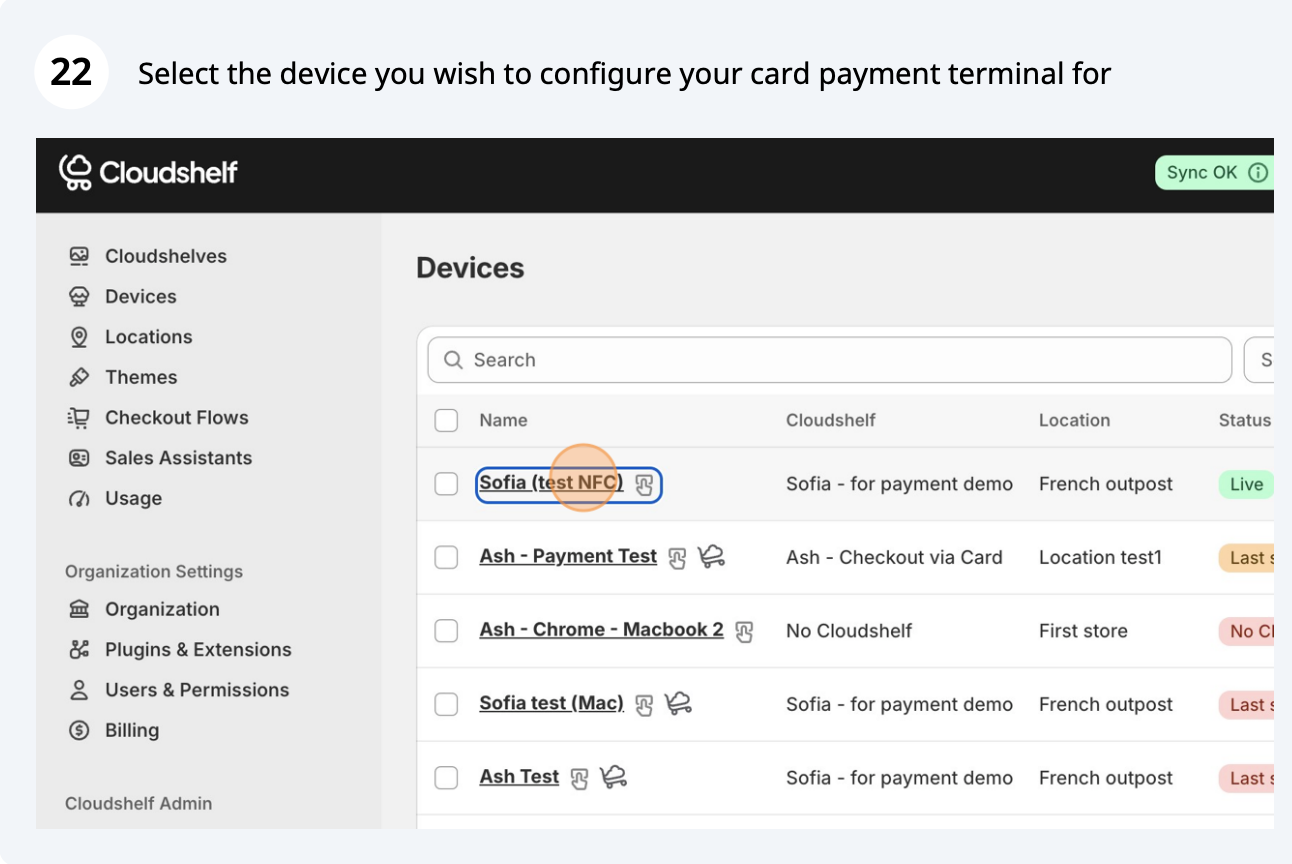
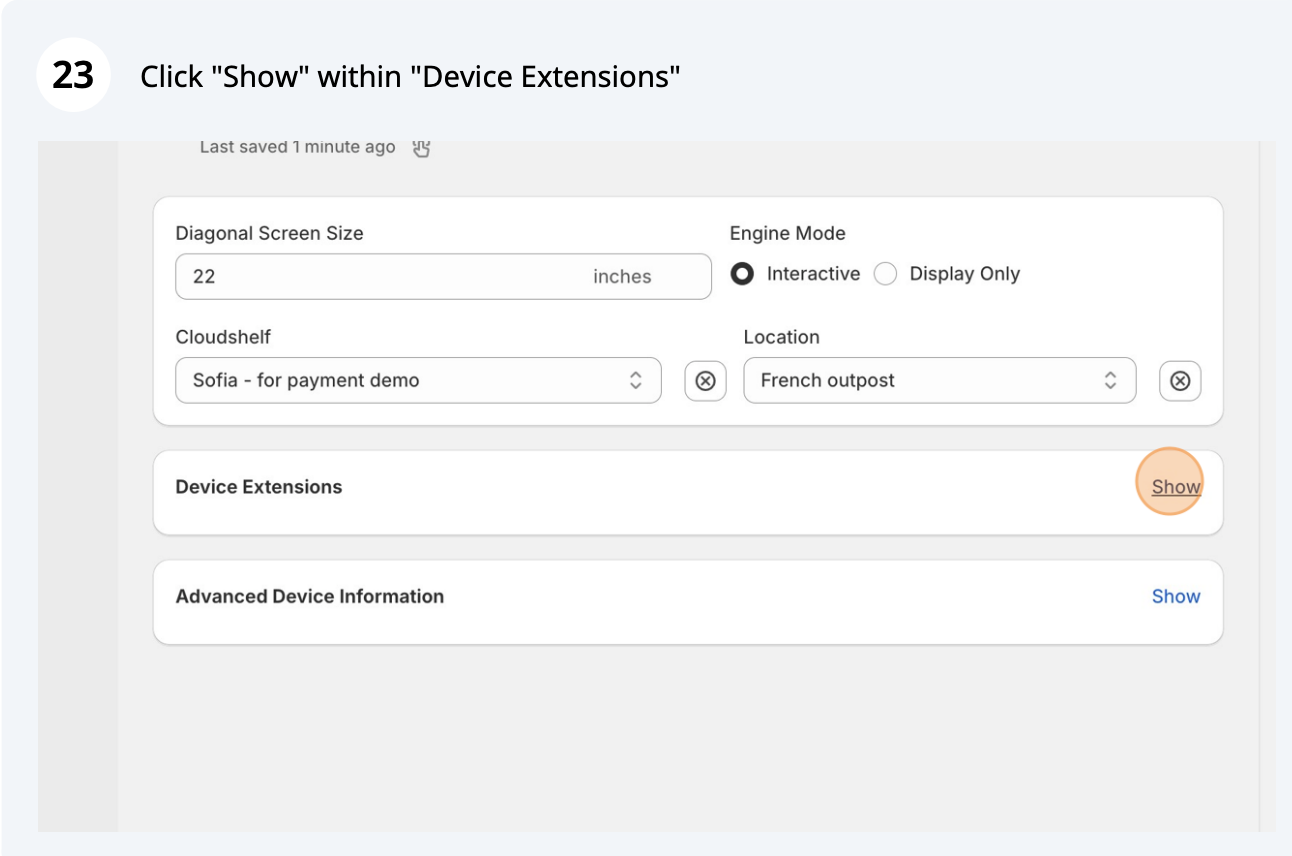
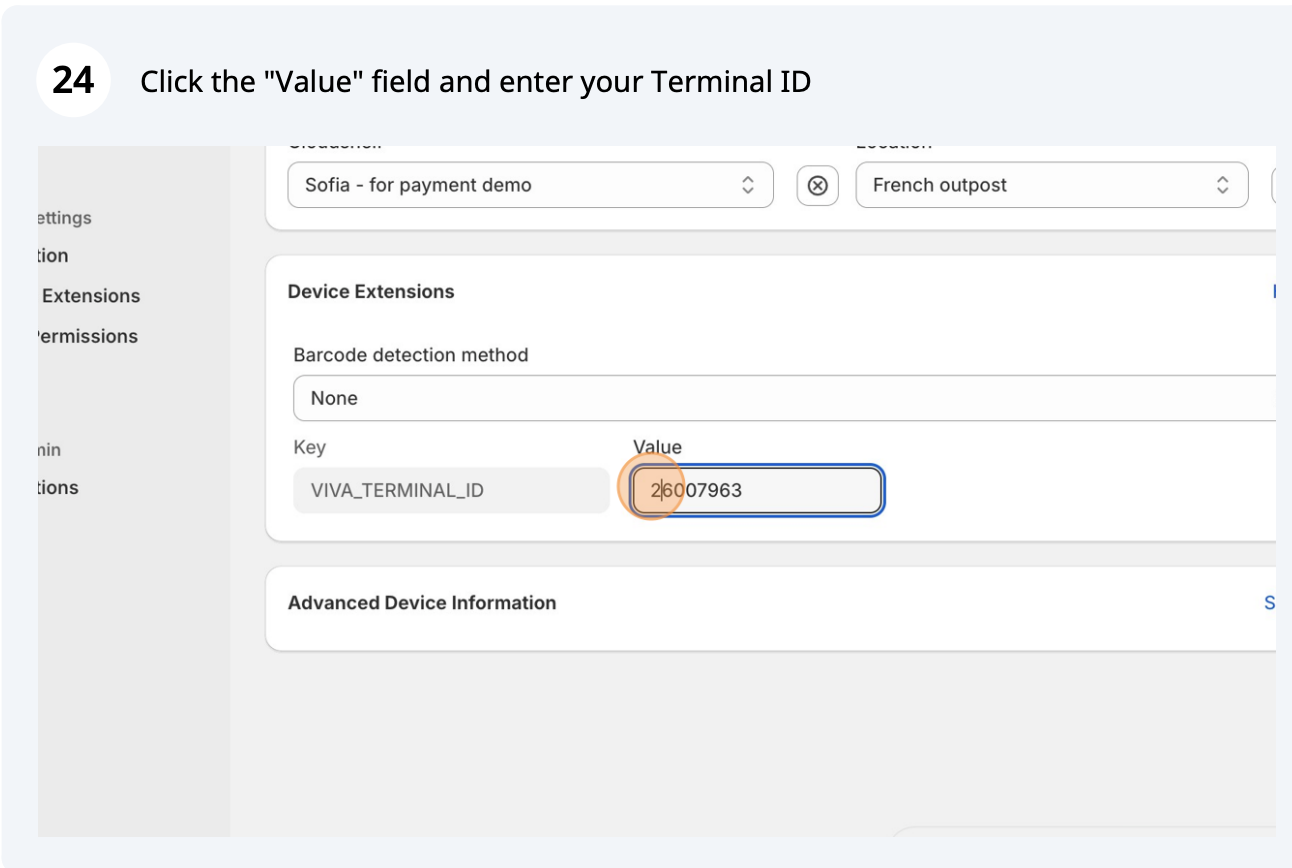
Save your Terminal ID to connect your Viva card payment terminal to your device