

Our Smart experience builder connects to your product catalogue within seconds and builds an interactive Cloudshelf experience for you in just a few minutes. It suggests product groups, a home screen and a headline, so your in-store display is ready for the shop floor with very little set-up.
This guide takes you through each step, from starting a new experience to testing the shopper journey.
Before you start
- Login to Cloudshelf via manager.cloudshelf.ai or launch the Cloudshelf app from your Shopify admin panel.
- Have a theme and checkout flow set up for your store. You can change both later.
Step 1: Start a new experience
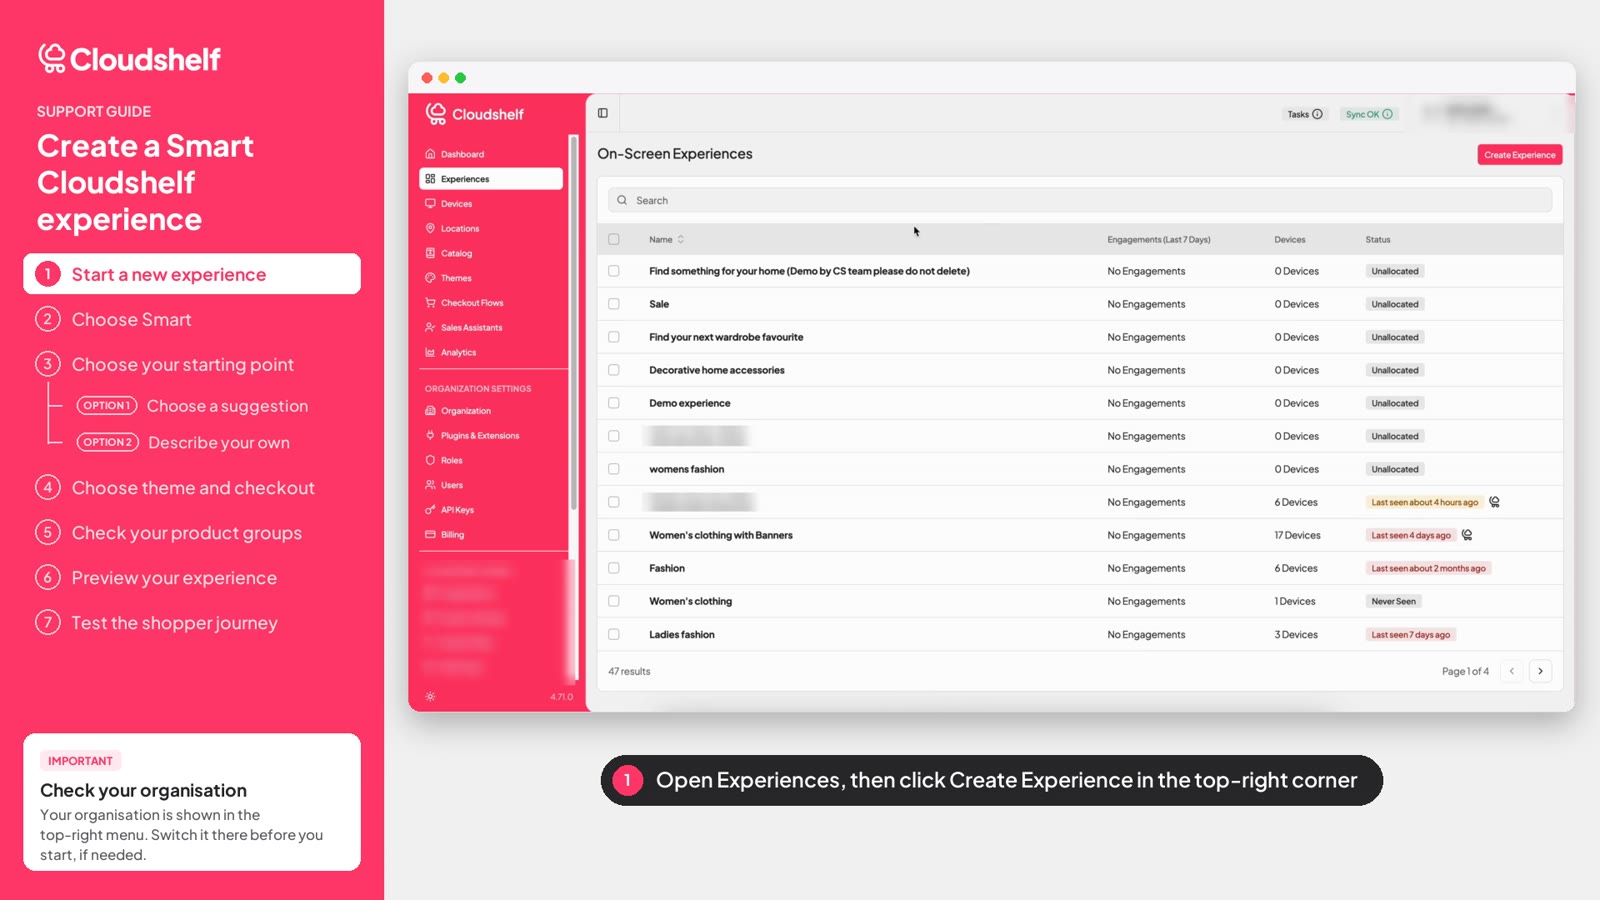
Open Experiences from the left-hand menu, then click Create Experience in the top-right corner.
Step 2: Choose Smart
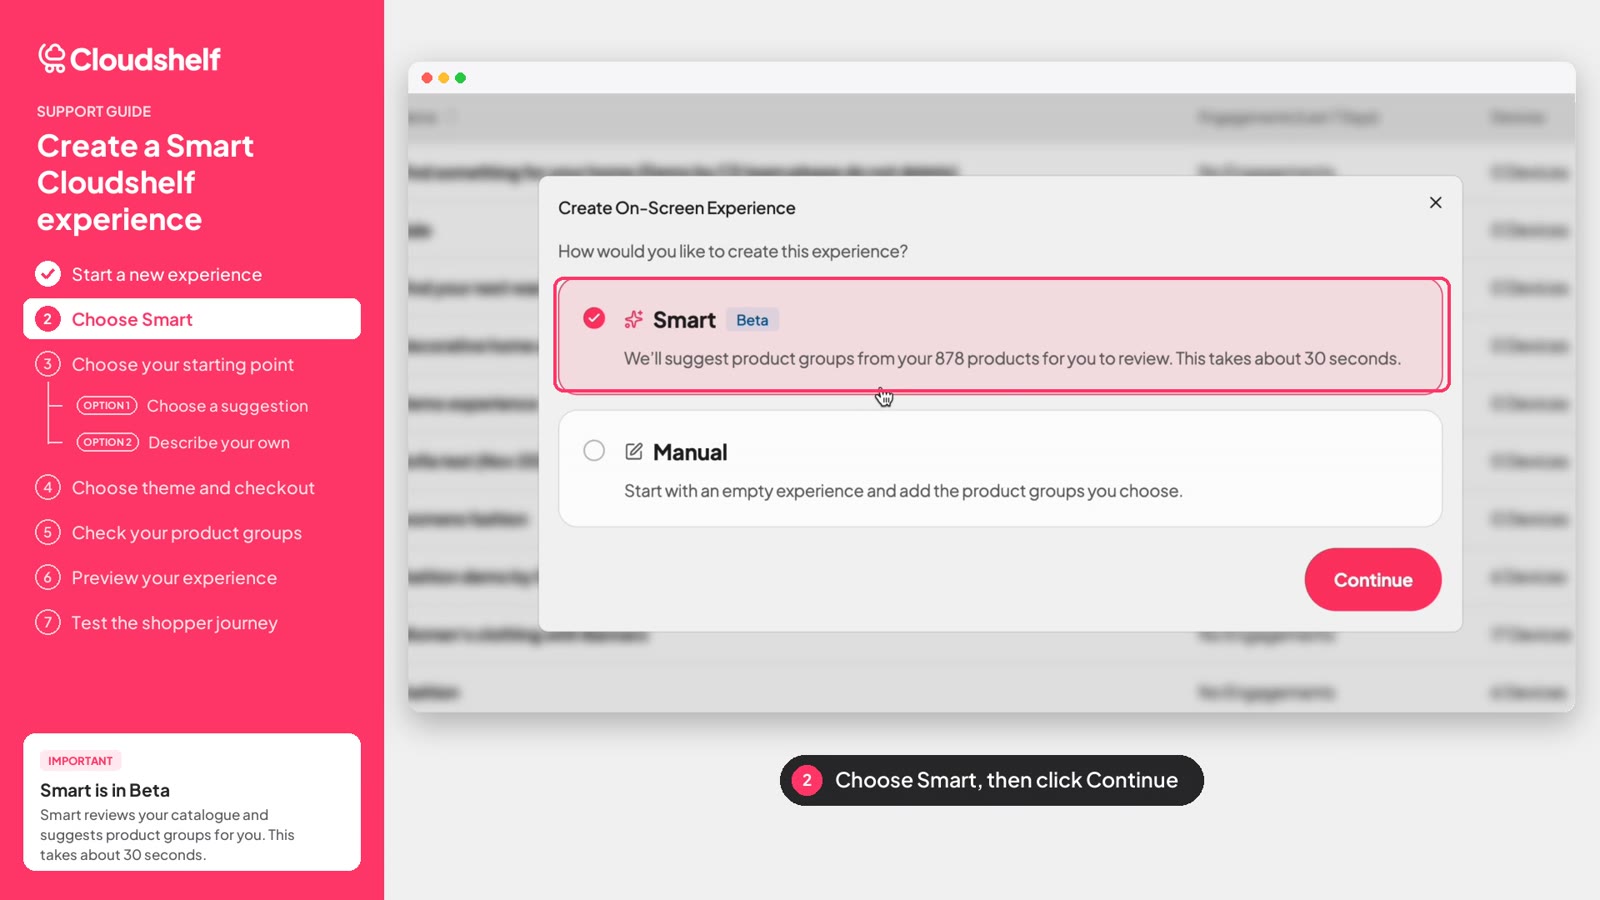
Select Smart, then click Continue. Cloudshelf reviews your catalogue and suggests product groups for you. This takes about 30 seconds.
Step 3: Choose your starting point
You have two options.
Option 1: Choose a suggestion
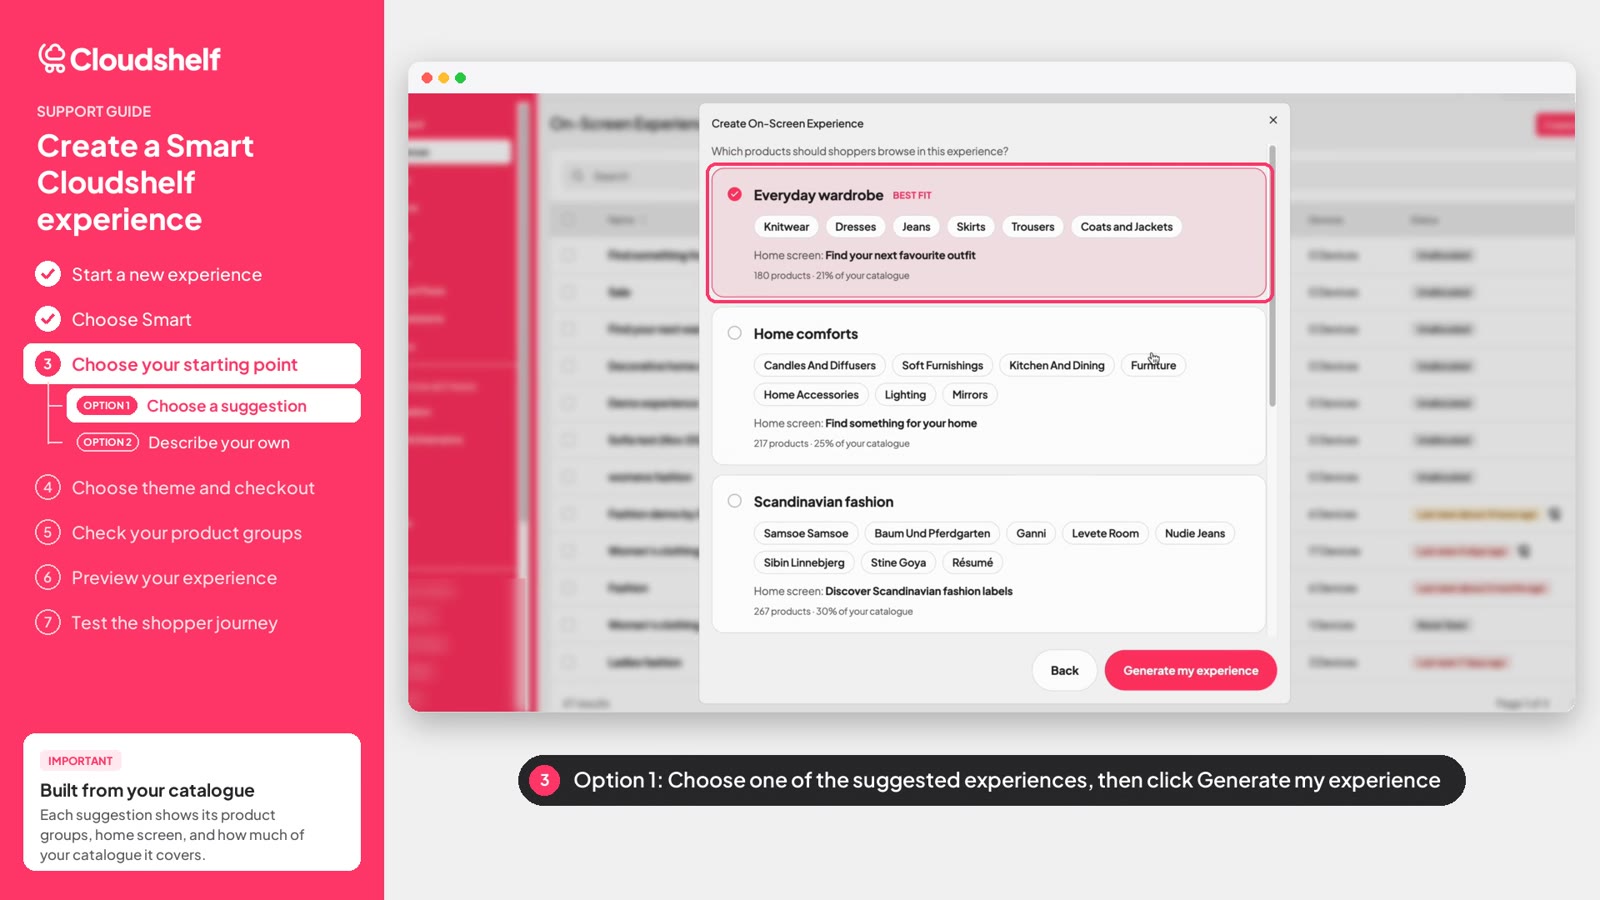
Pick one of the suggested experiences, then click Generate my experience. Each suggestion shows its product groups, the home screen headline and how much of your catalogue it covers.
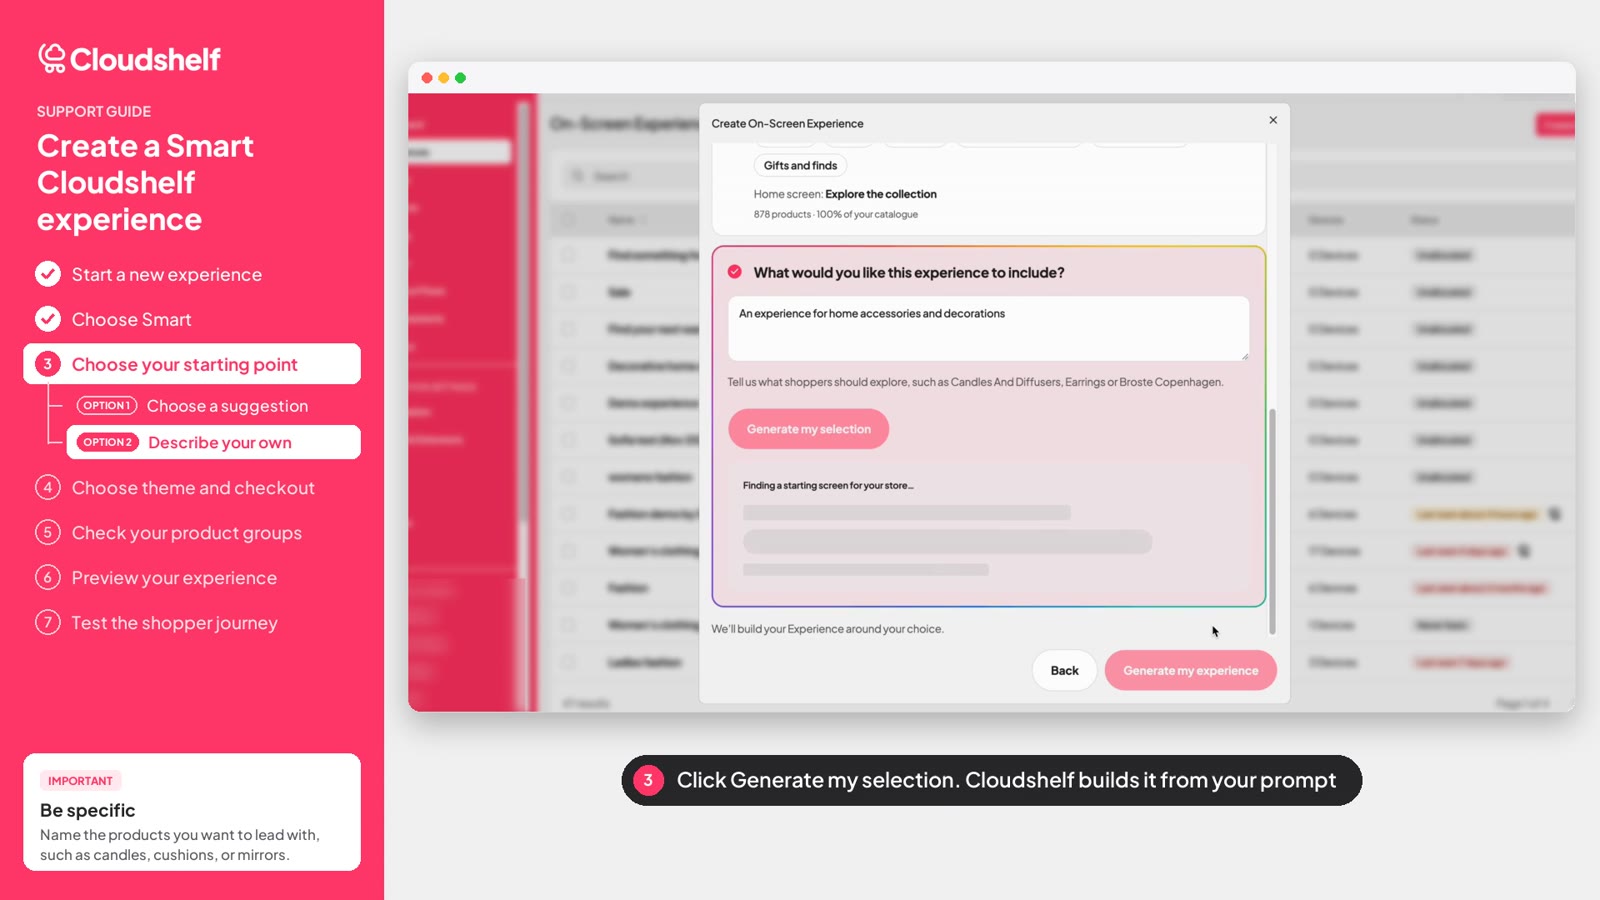
Option 2: Describe your own
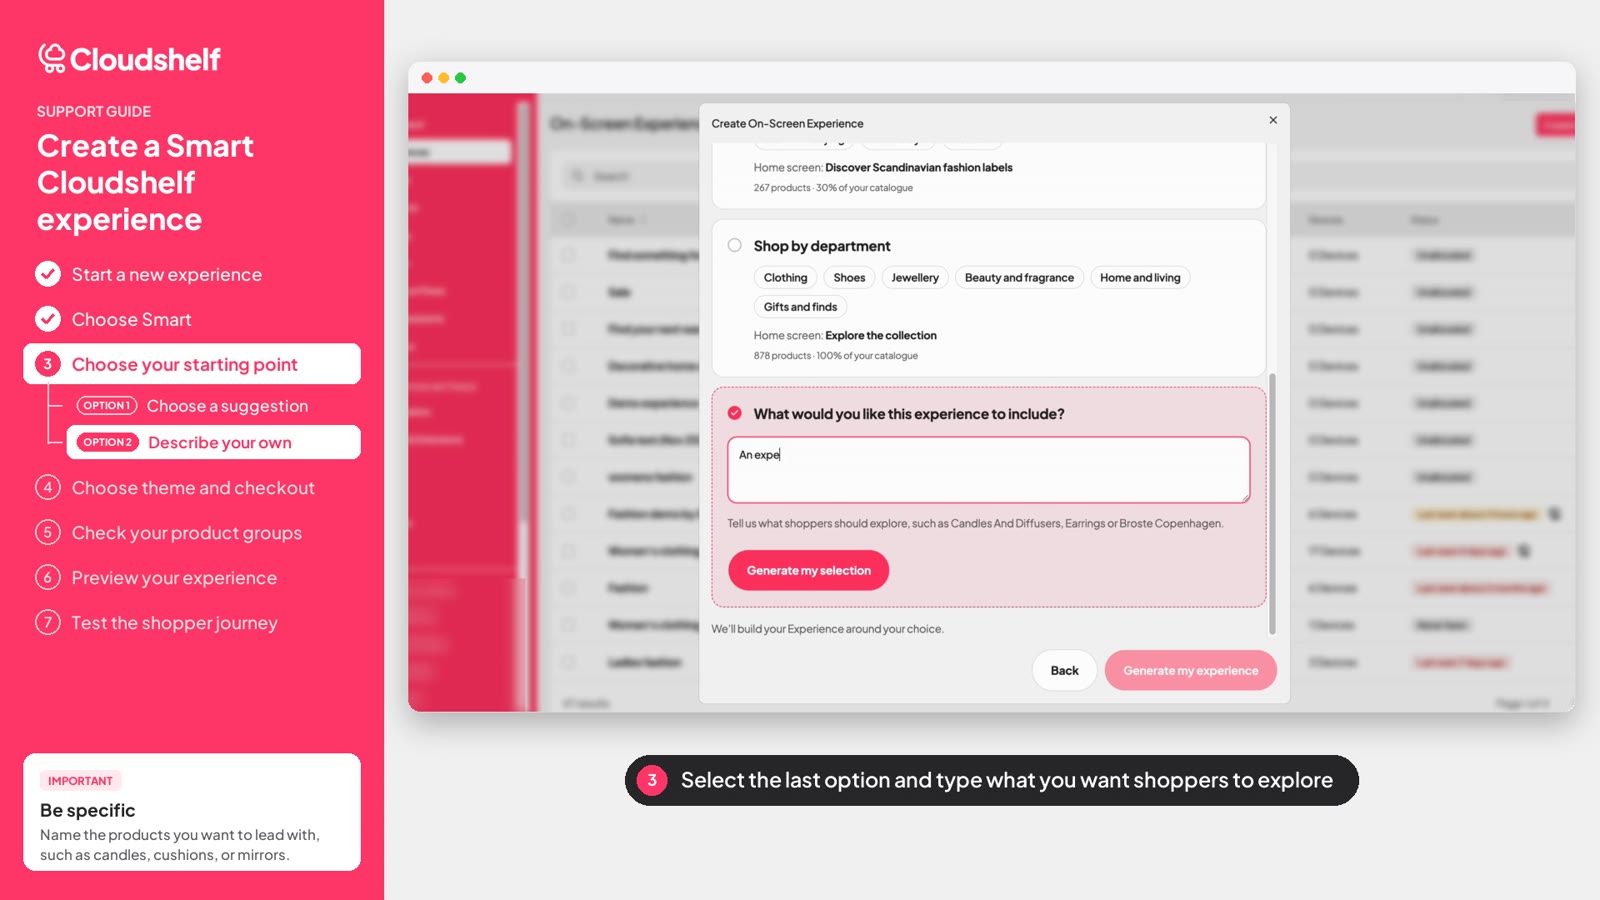
- Scroll down and select What would you like this experience to include?
- Type what you want shoppers to explore. Be specific and name the products you want to lead with, such as candles, cushions or mirrors.
- Click Generate my selection. Cloudshelf builds the product groups from your prompt.
- Check the product groups, then click Generate my experience.
Step 4: Choose your theme and checkout
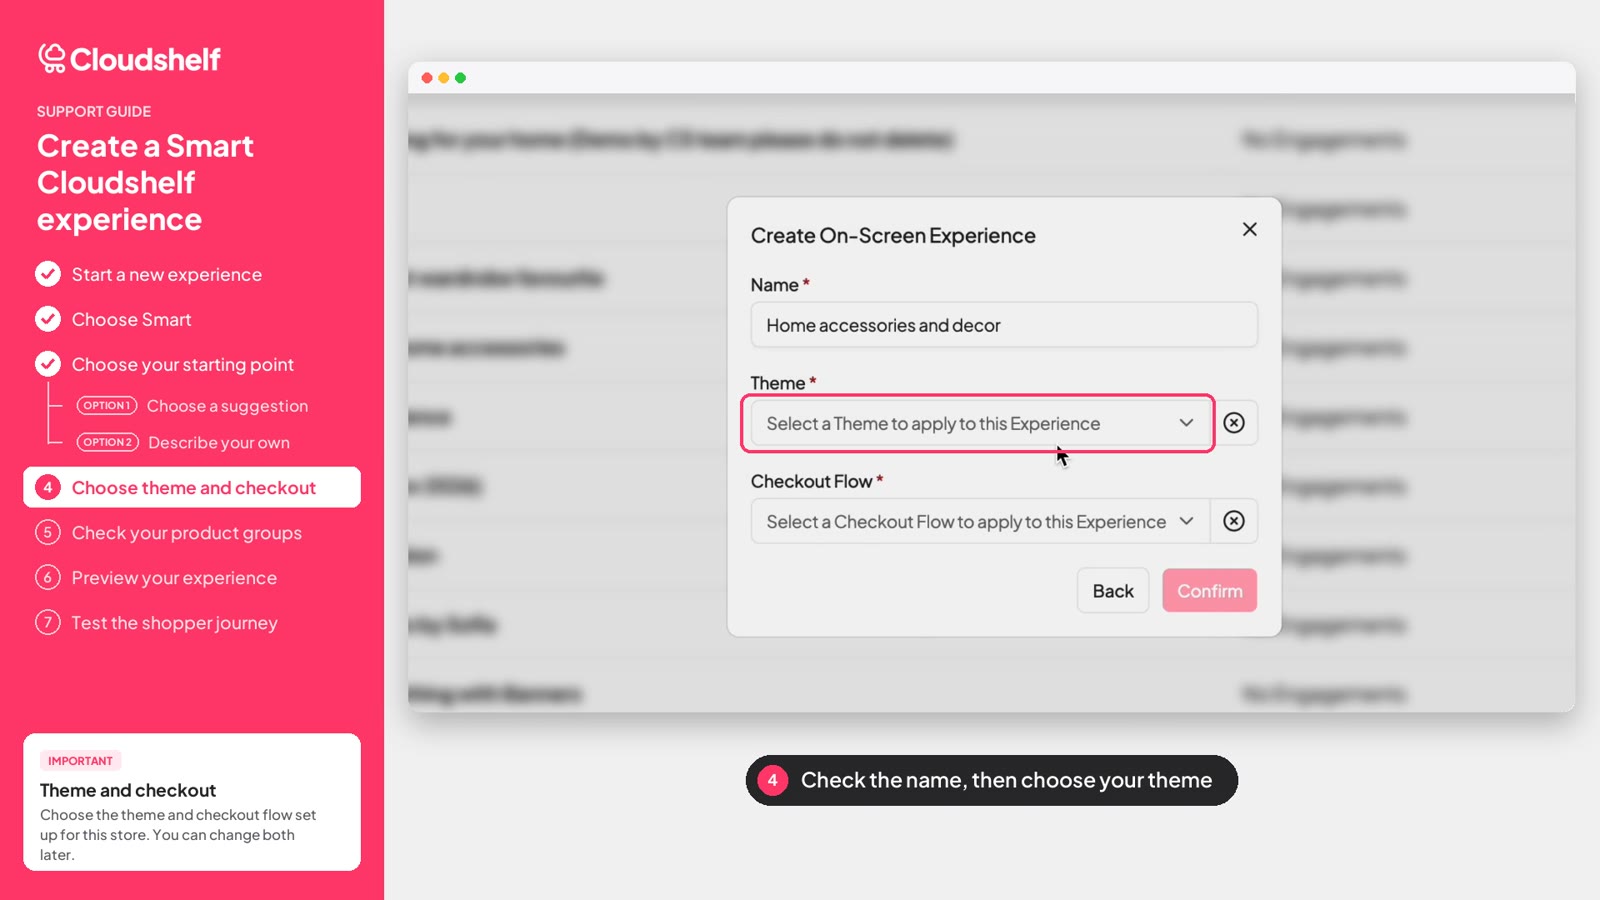
- Check the experience name.
- Choose the Theme to apply.
- Choose your Checkout Flow, then click Confirm.
Step 5: Check your product groups
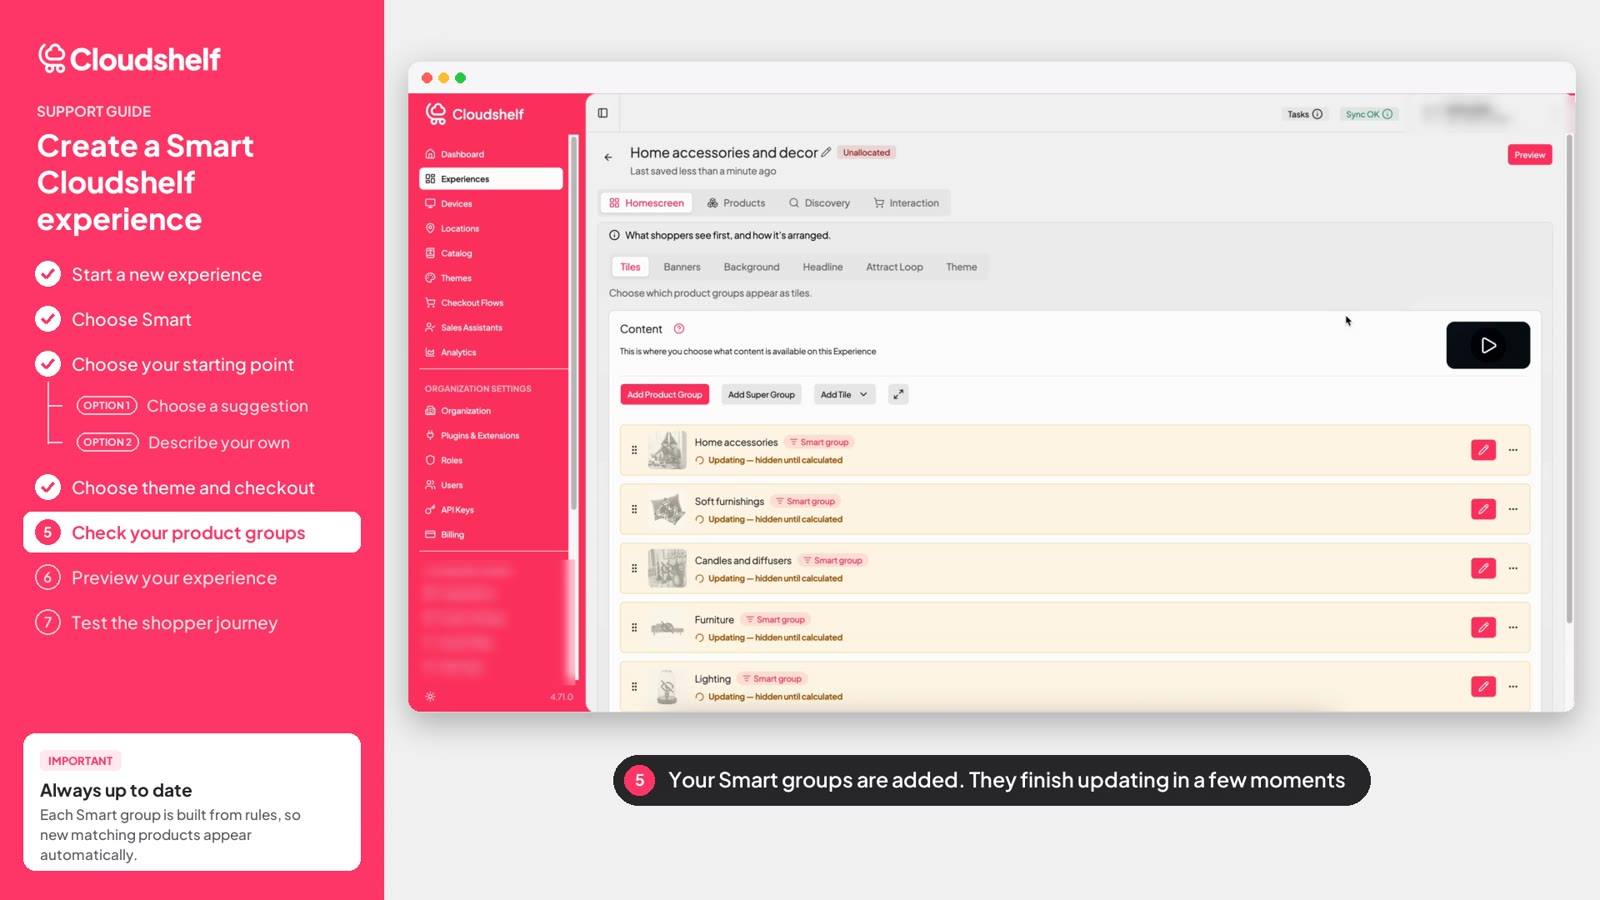
Cloudshelf creates your experience and adds your Smart Groups. They finish updating in a few moments.
Each Smart Group is built from rules, so new matching products appear automatically. Your experience stays up to date without any extra work.
Step 6: Preview your experience
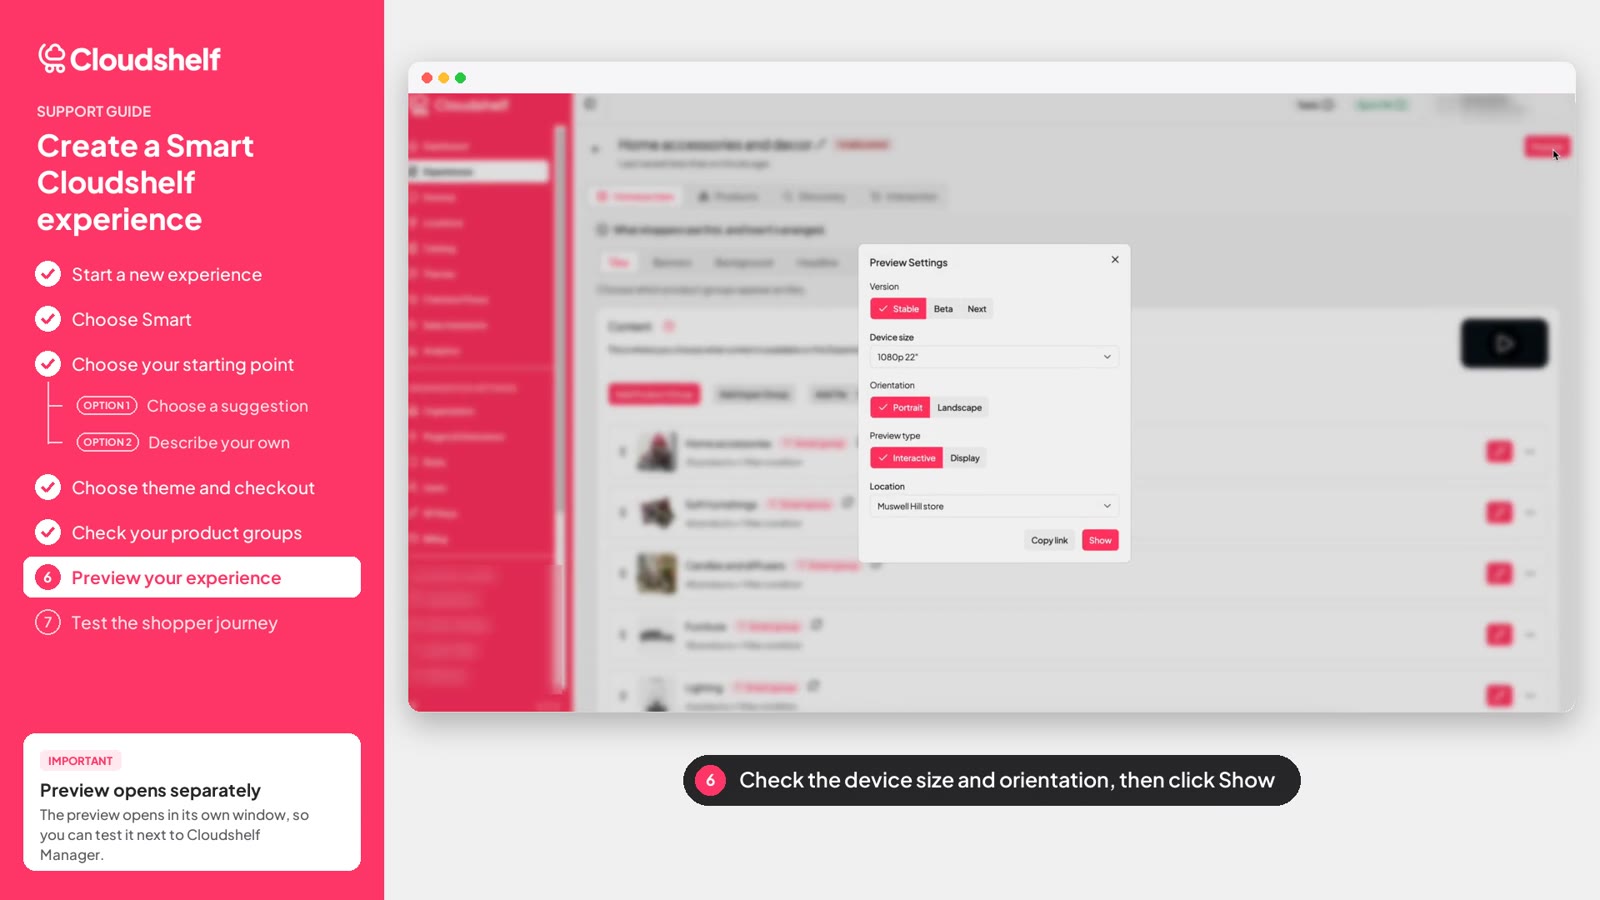
- Click Preview in the top-right corner.
- Check the device size and orientation, for example 1080p 22" in Portrait.
- Click Show. The preview opens in its own window, so you can test it next to Cloudshelf Manager.
Step 7: Test the shopper journey
Walk through the experience as a shopper would:
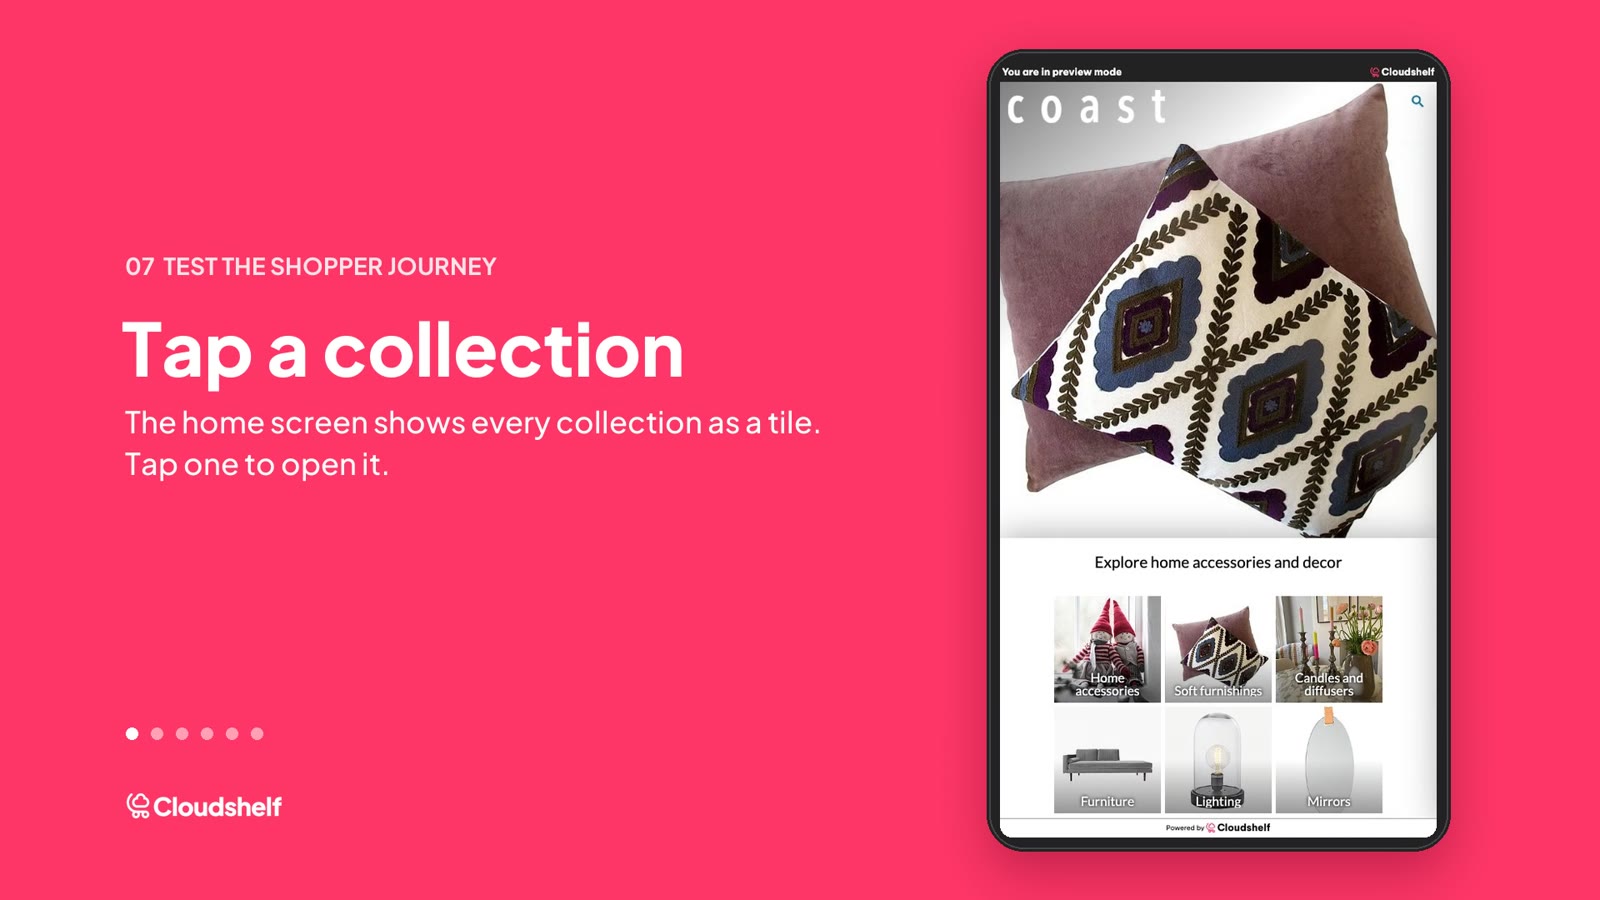
- Tap a collection. The home screen shows every collection as a tile.
- Browse the products. Scroll the product grid, then tap a product to open it.
- Add to basket. See the price, details and great alternatives, then tap Add to Basket.
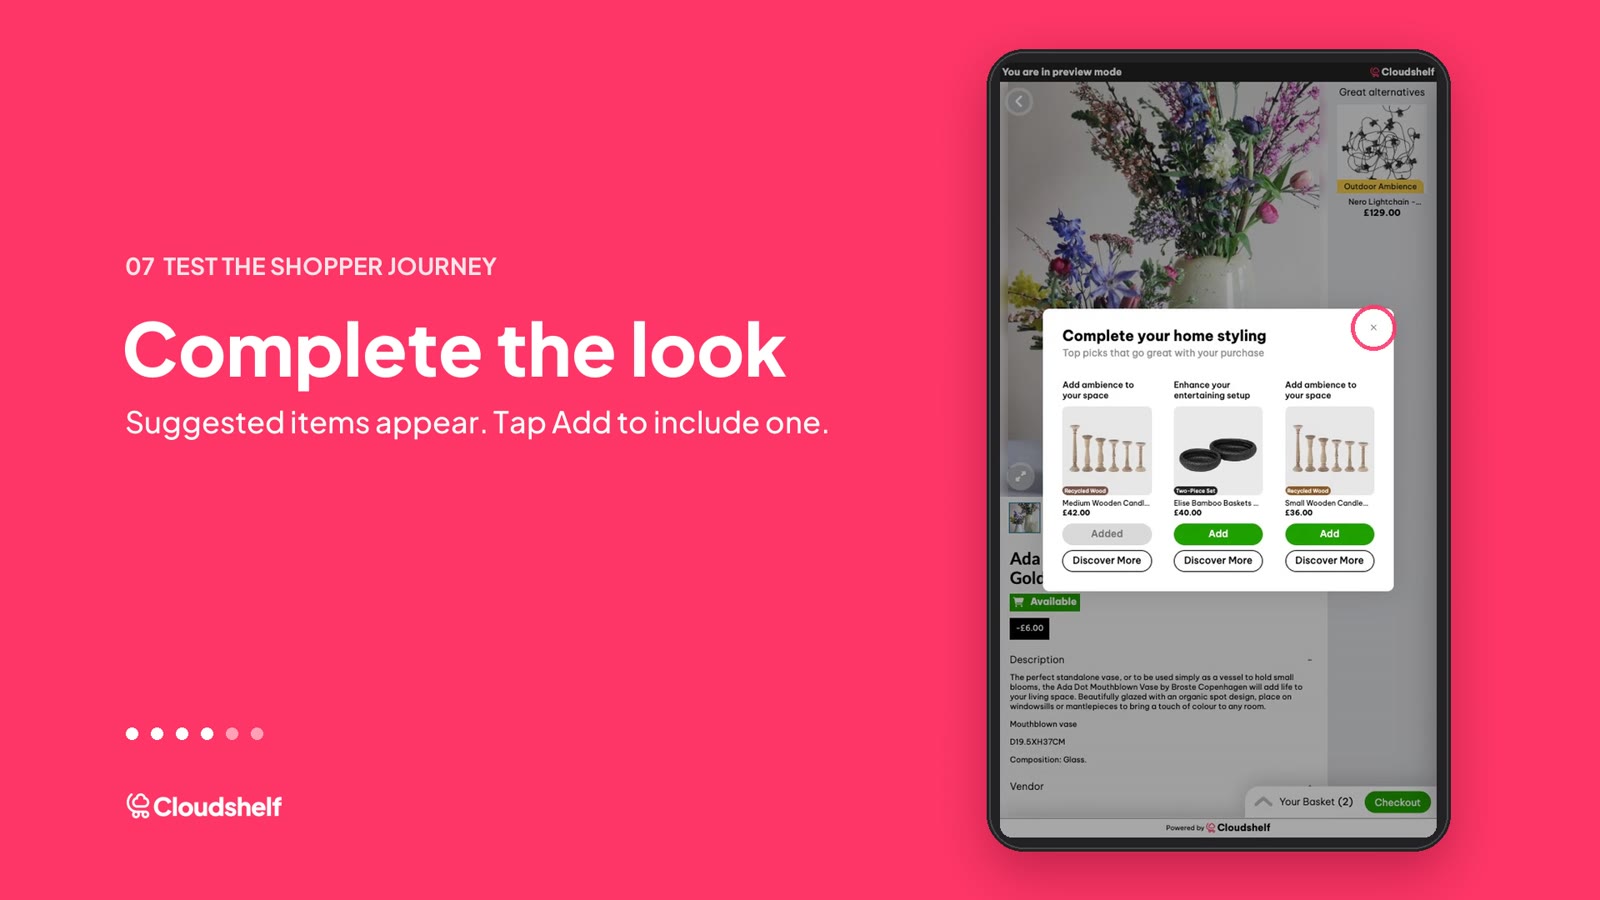
- Complete the look. Suggested items appear. Tap Add to include one.
- Check the basket. Tap Checkout to see the items and the total.
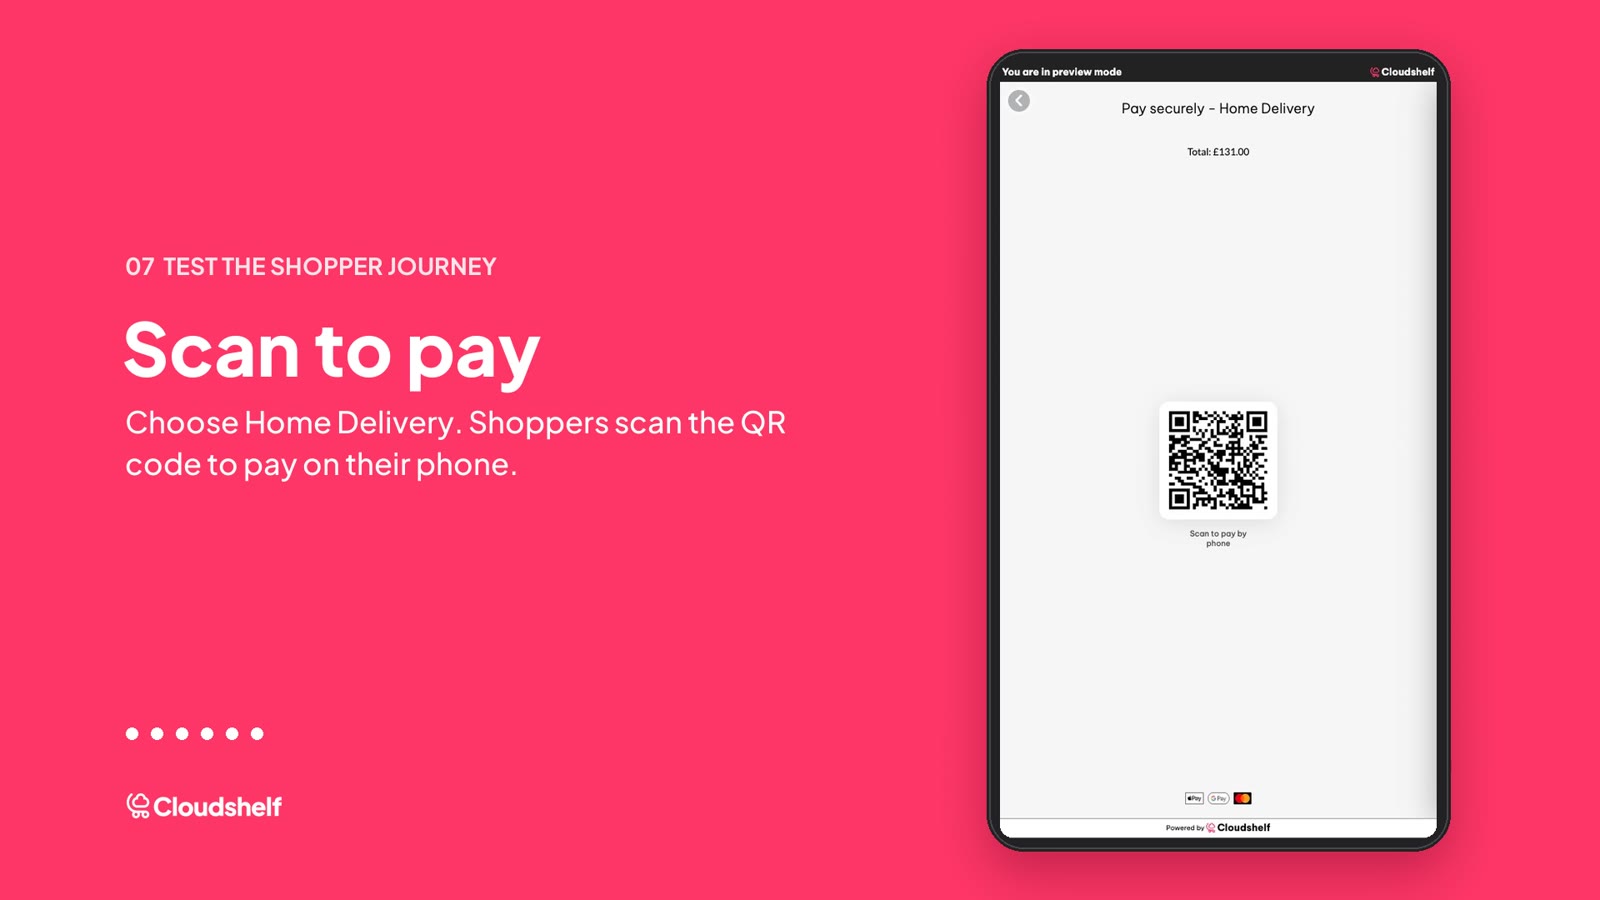
- Scan to pay. Choose Home Delivery. Shoppers scan the QR code to pay on their phone.
Your Smart experience is now ready for the shop floor. Assign it to a device to give shoppers an endless aisle of your full range on any in-store screen.