
Please read the whole guide before you begin.
Before you start
Tools required:
- 1 x empty USB stick
- 1 x USB male A to male A cable
Downloads required:
- SDK Platform Tools: developer.android.com/studio/releases/platform-tools
- Android Kiosk APK: Kiosk Lockdown Browser.apk
1. Factory reset the Android system
ADB installation needs a complete refresh of the system before you start.
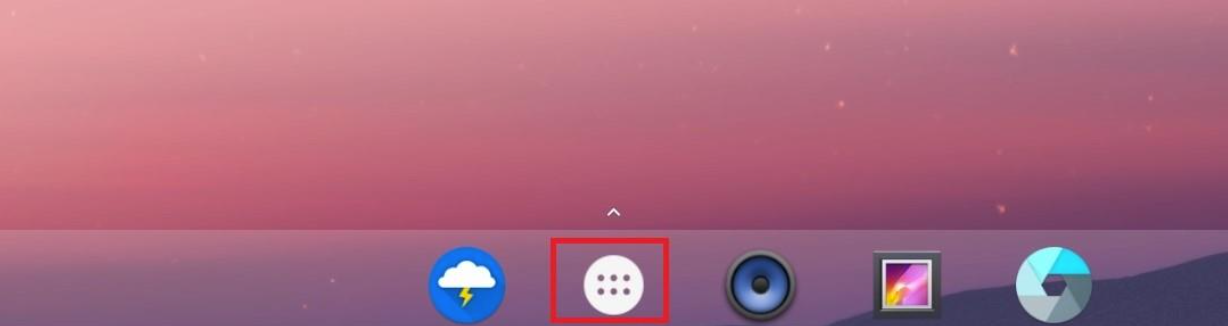
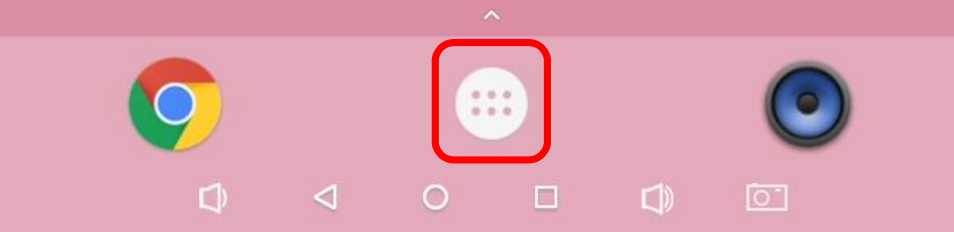
Step 1. Open the app tray by tapping the 6-dots icon at the bottom of the display.
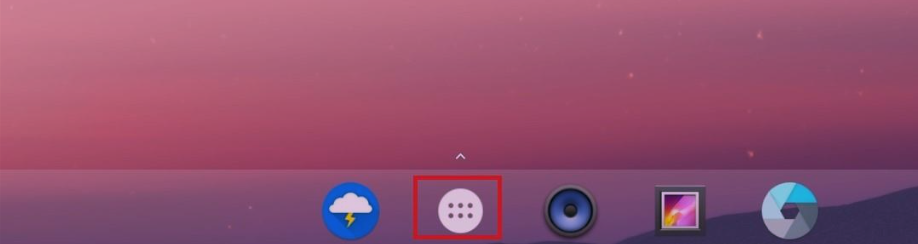
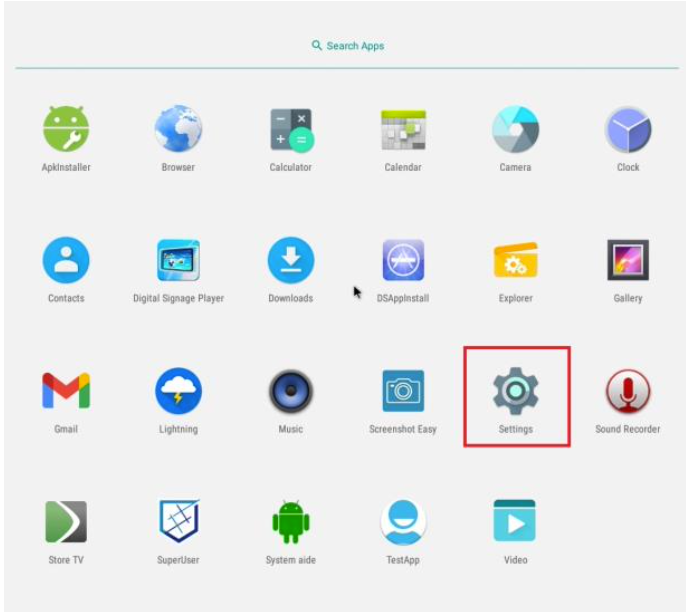
Step 2. Tap the 'Settings' application.
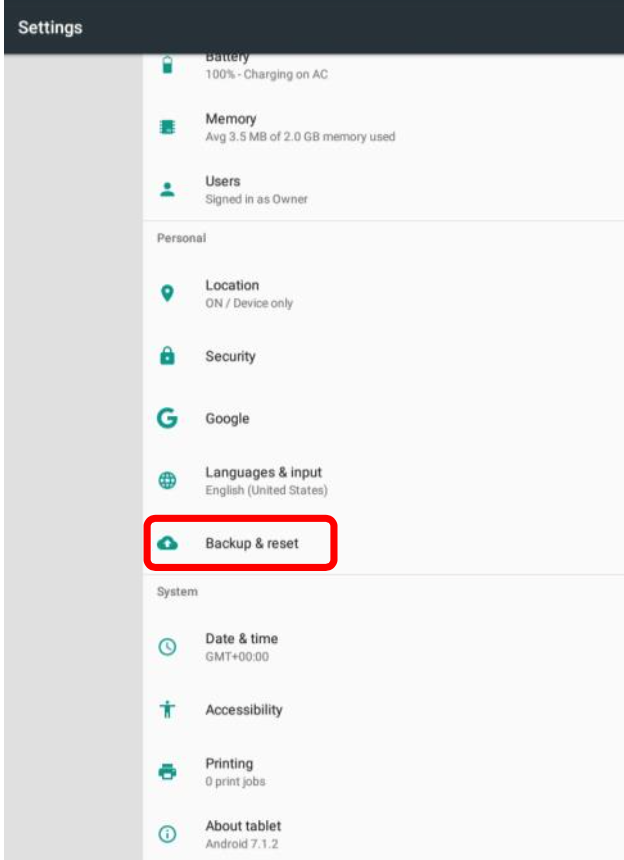
Step 3. Scroll down and select 'Backup & reset'.
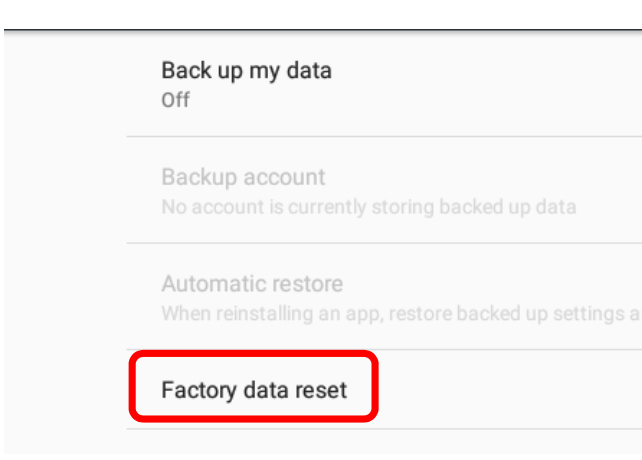
Step 4. Select 'Factory data reset'.
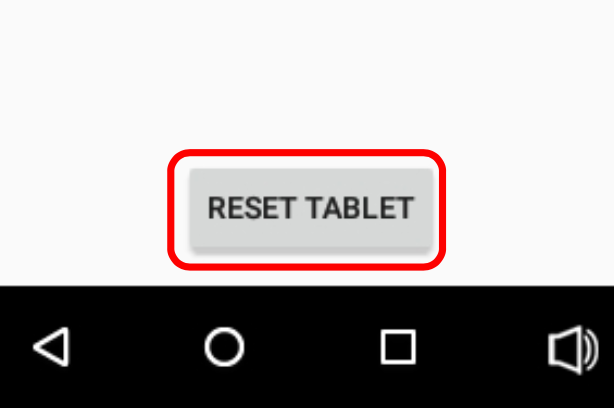
Step 5. Select 'RESET TABLET' at the very bottom.
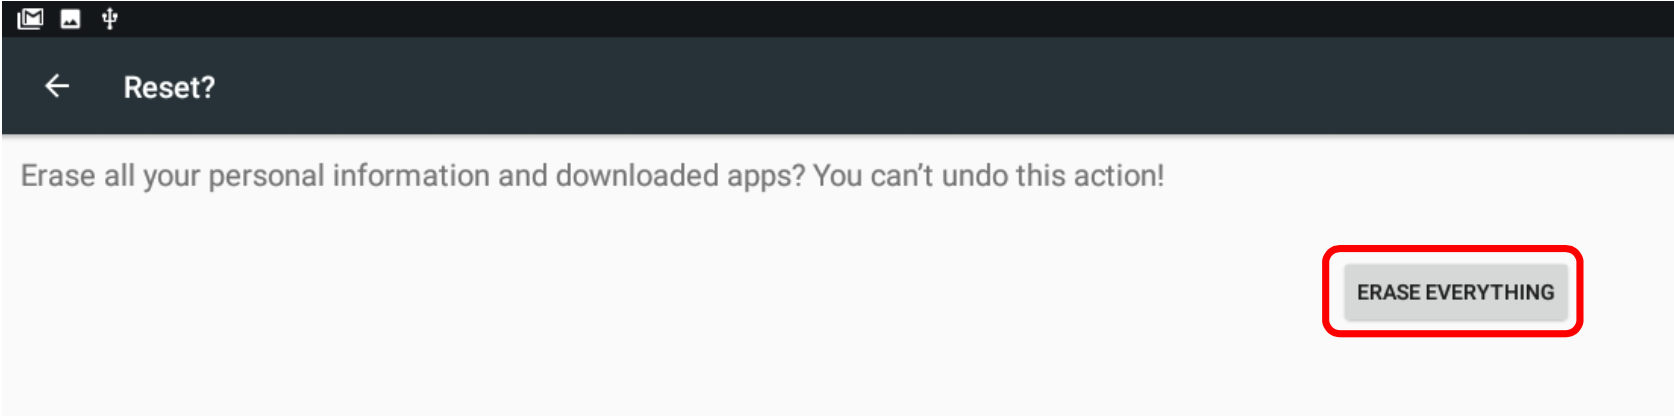
Step 6. Select 'ERASE EVERYTHING' to confirm the reset.
Be patient when the screen goes dark: this can take up to 10 minutes.
2. Enable developer mode
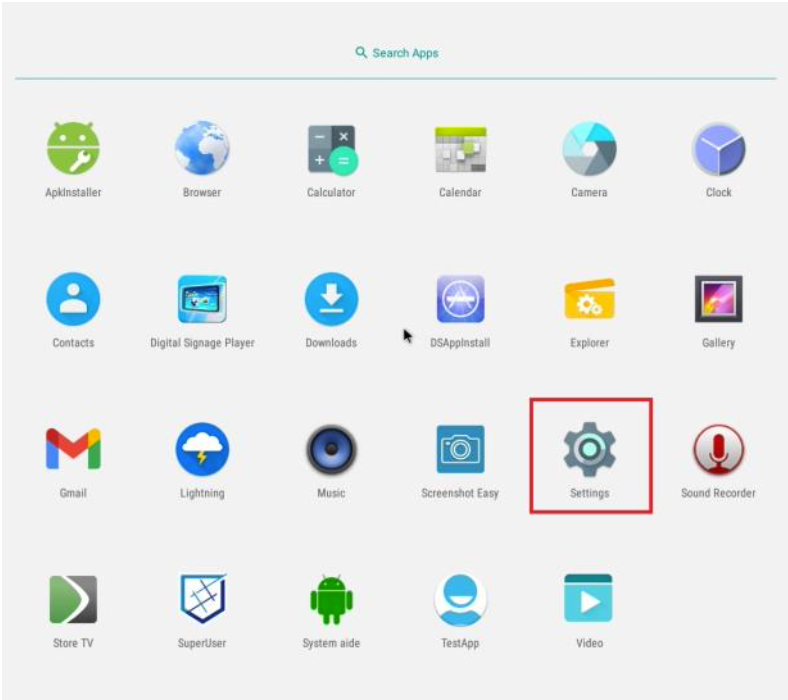
Step 1. Once the screen is back on the Android home screen, open the app tray by tapping the 6-dots icon at the bottom of the display.
Step 2. Tap the 'Settings' application.
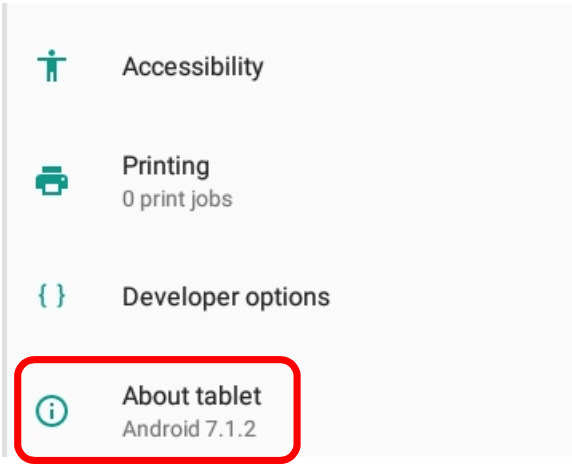
Step 3. Go to the very bottom and select 'About tablet'.
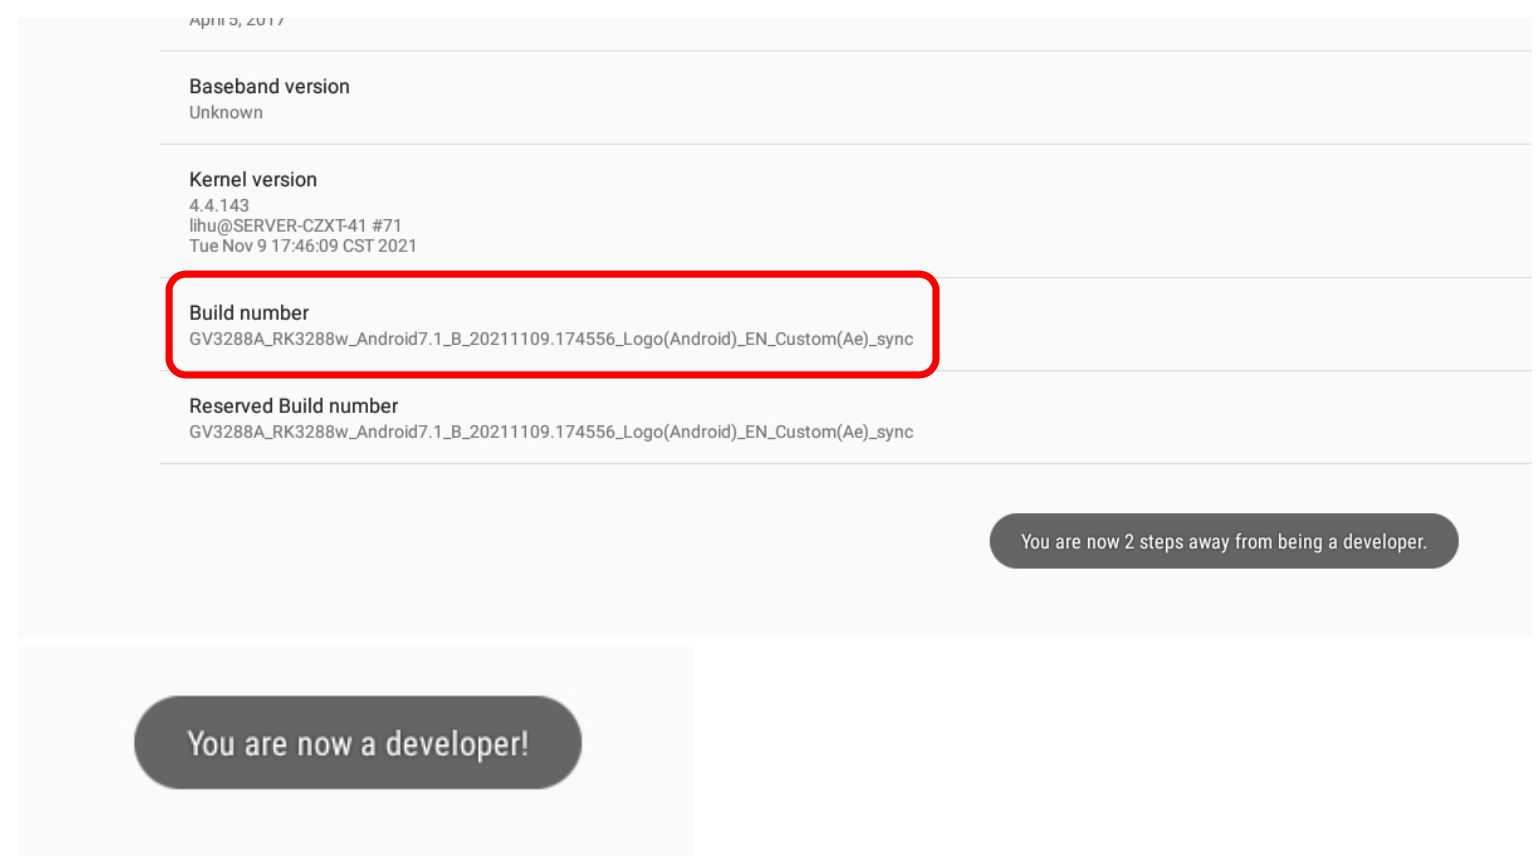
Step 4. Tap 'Build number' 7 times to become a developer.
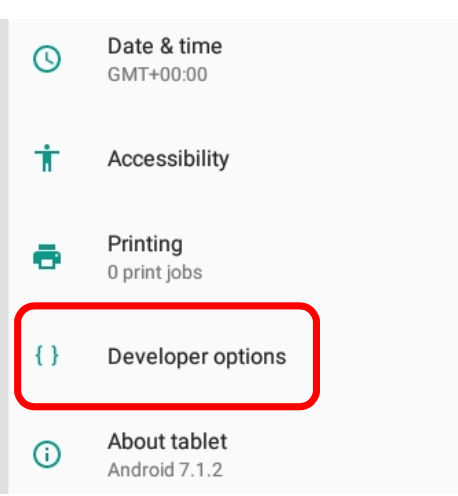
Step 5. Back out of this area and select the newly added 'Developer options'.
Step 6. Scroll down to 'Debugging'. Make sure both 'USB debugging' and 'USB OTG' are enabled. This gives ADB access to the screen via the USB cable.

3. Install Kiosk Lockdown Browser from the USB stick
Step 1. Open the app tray by tapping the 6-dots icon at the bottom of the display.
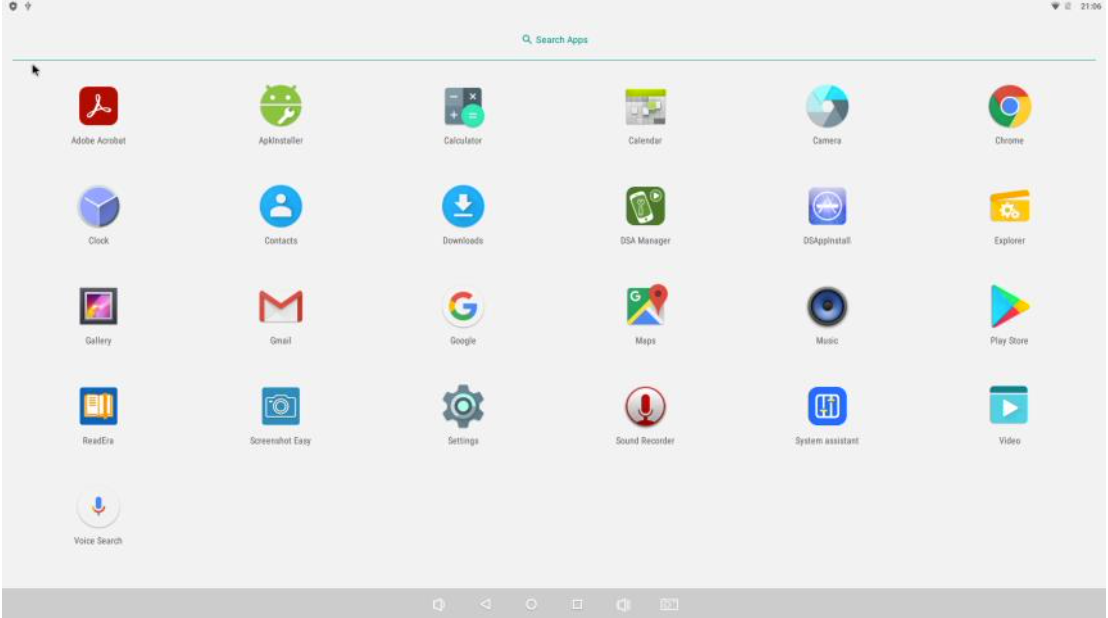
Step 2. In the app tray, select 'Explorer'.
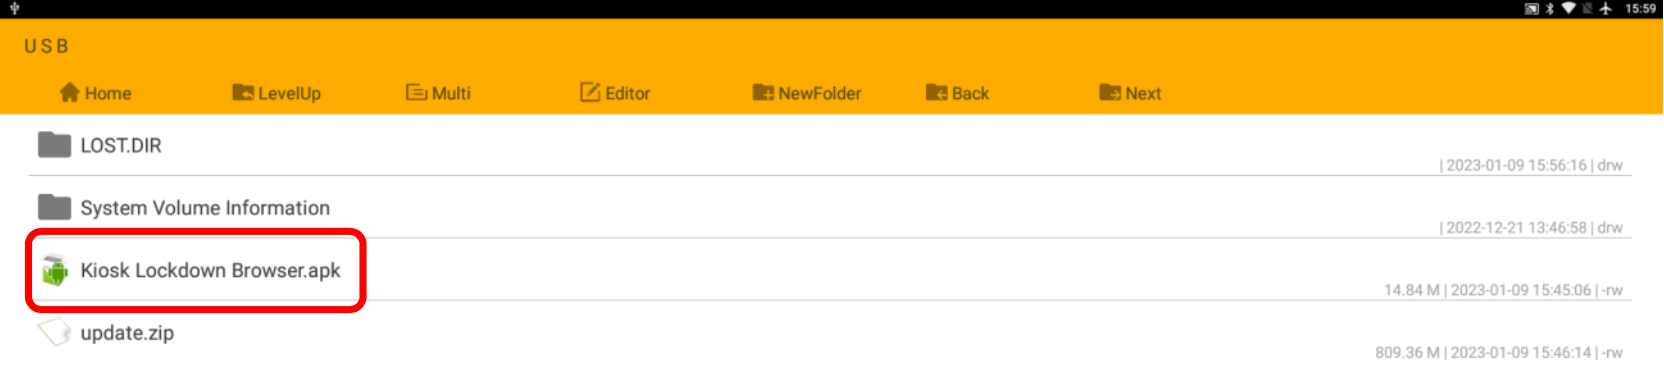
Step 3. Select the 'USB' folder.

Step 4. Select the .apk file and press 'Install' on the pop-up.
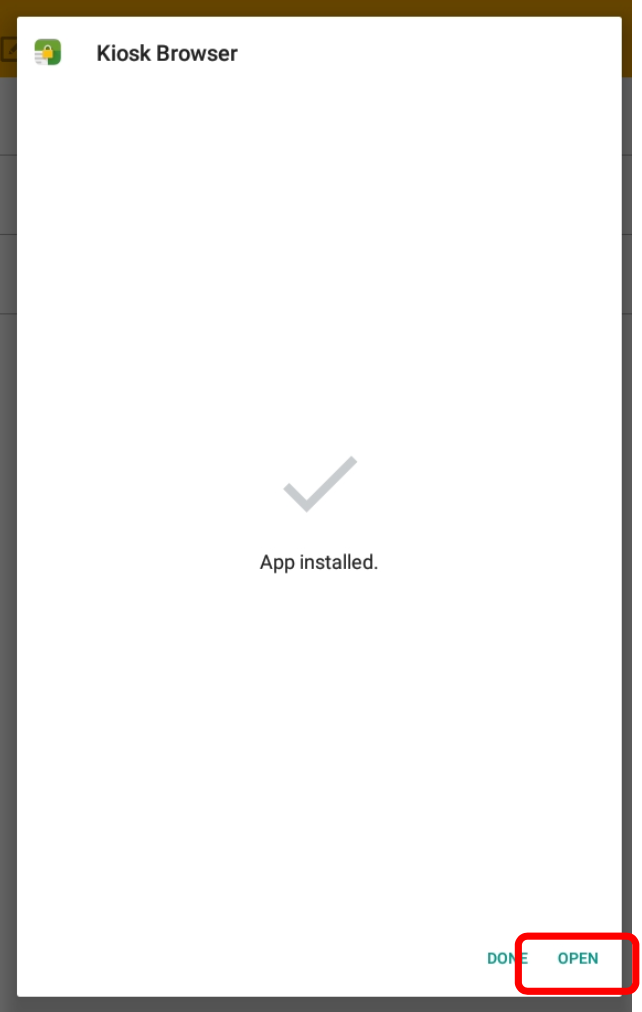
Step 5. Select 'Open' once installed.
Step 6. Accept and enable all the settings when asked during the process.
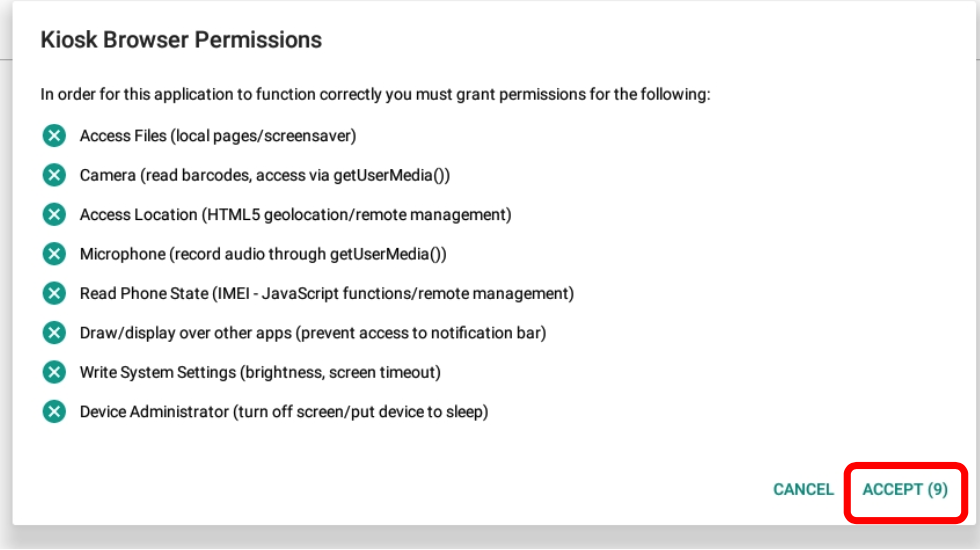
Step 7. On the final permissions, enable the two switches and press the back button after each one.
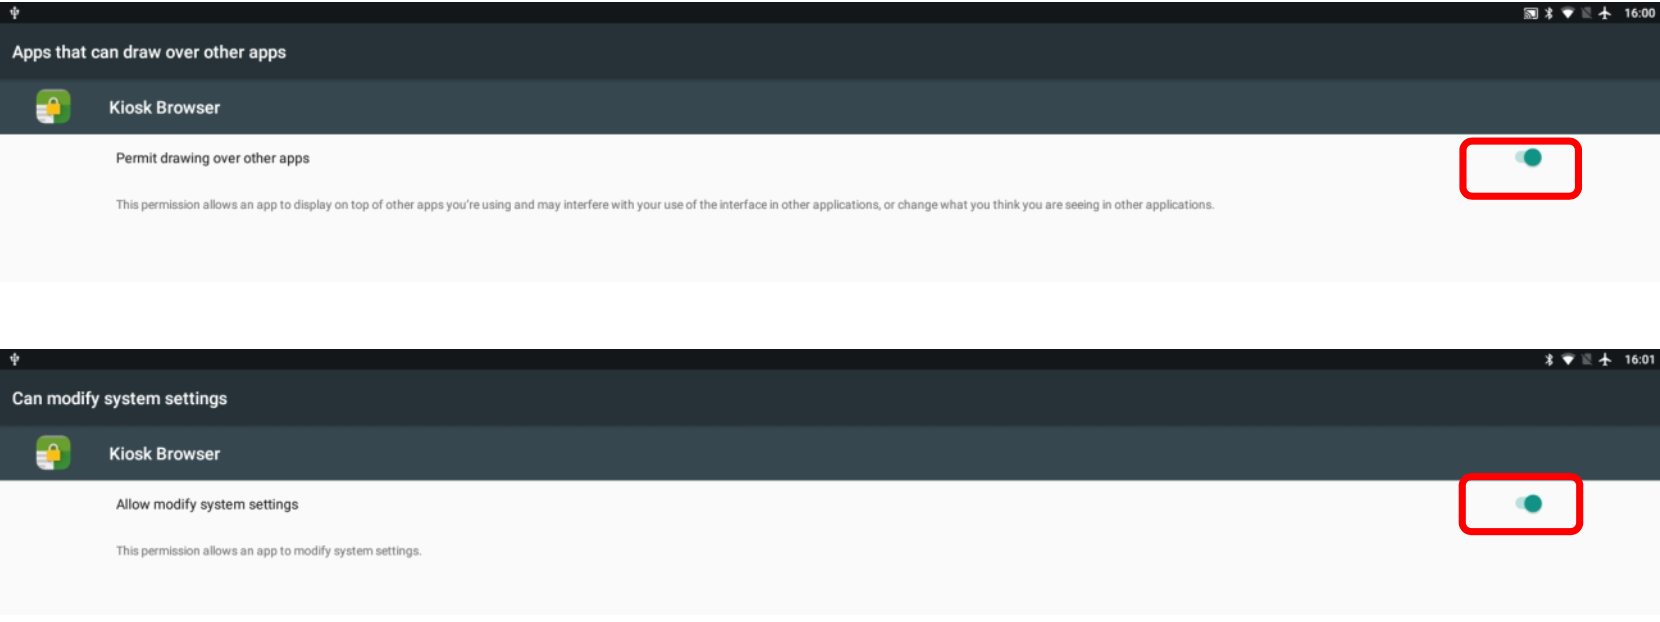
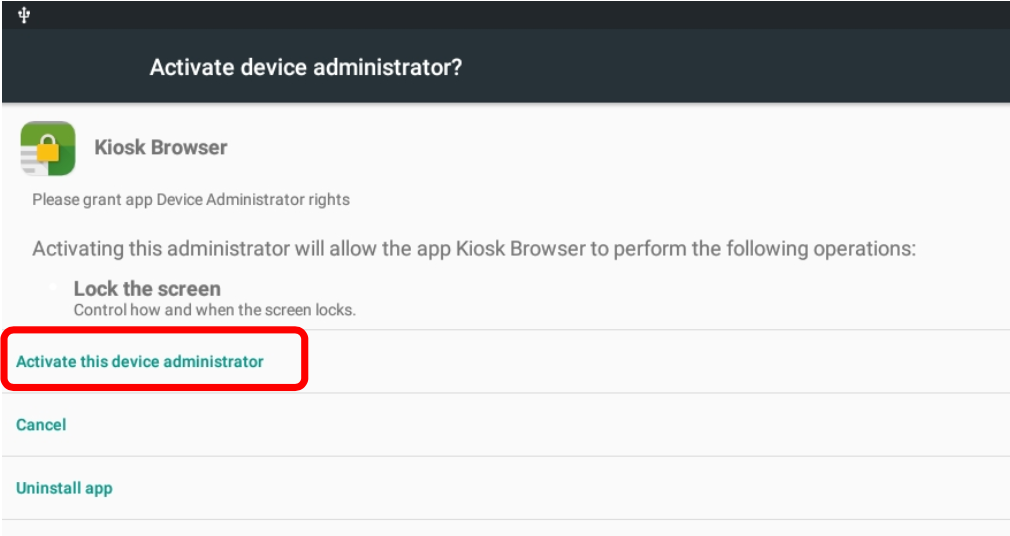
Select 'Activate the device administrator' on the final permission.
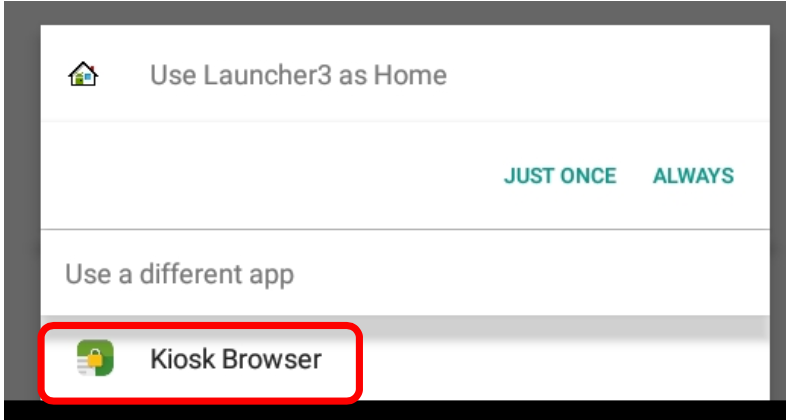
Step 8. Select 'Kiosk Browser' to open the application.
4. Make Kiosk Lockdown Browser the device owner with ADB
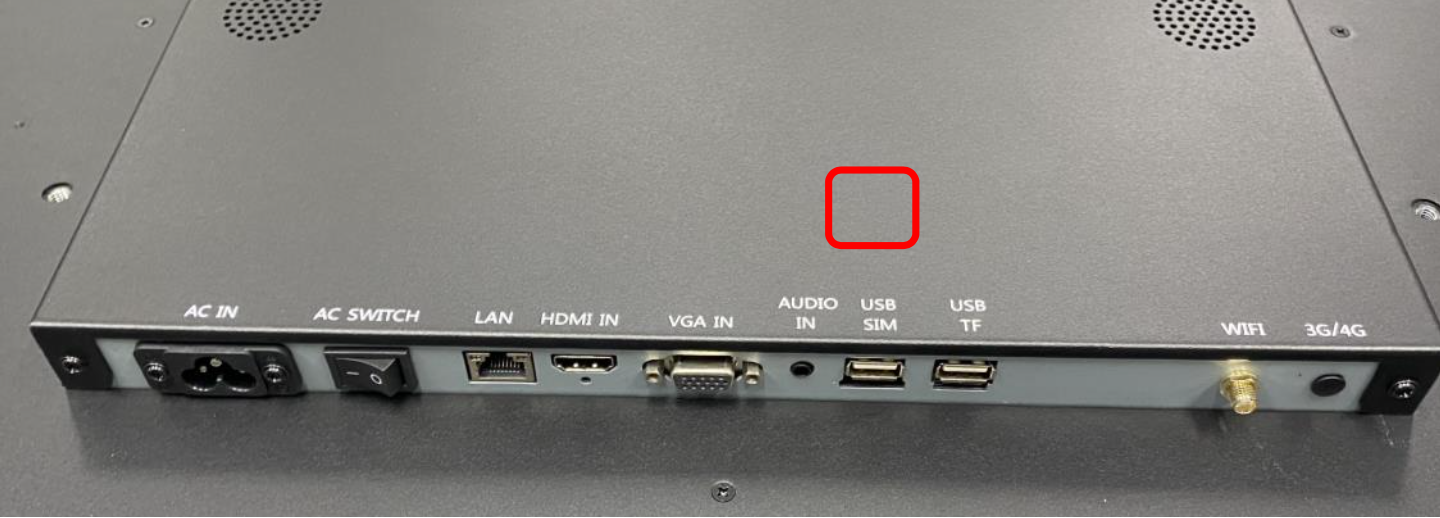
Step 1. Connect a USB male-to-male cable from your PC or laptop to the screen’s OTG port, as shown below.
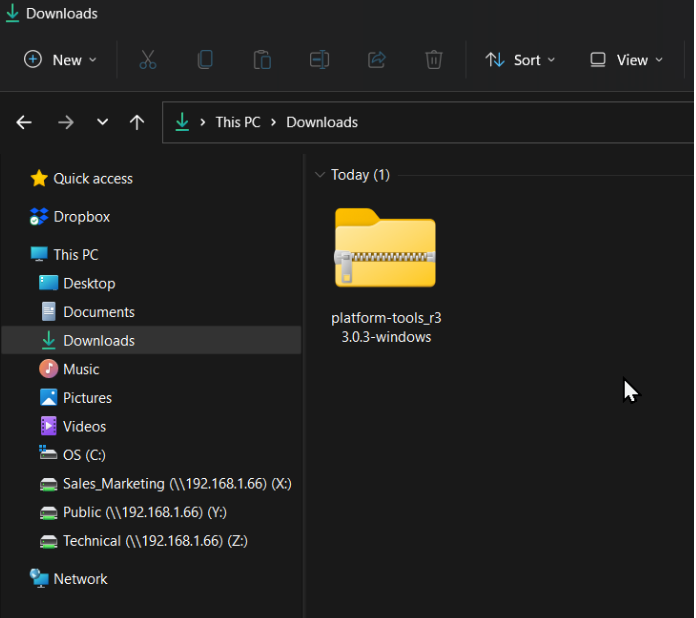
Step 2. Download the SDK Platform Tools (see Before you start) to your downloads folder.
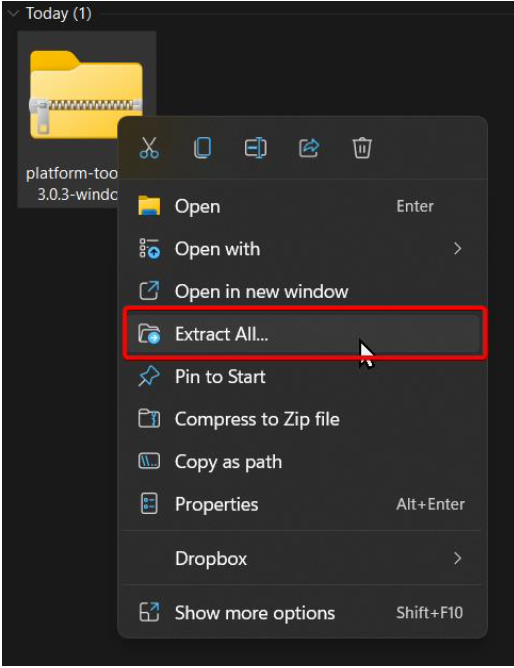
Step 3. Extract the file to the same folder.
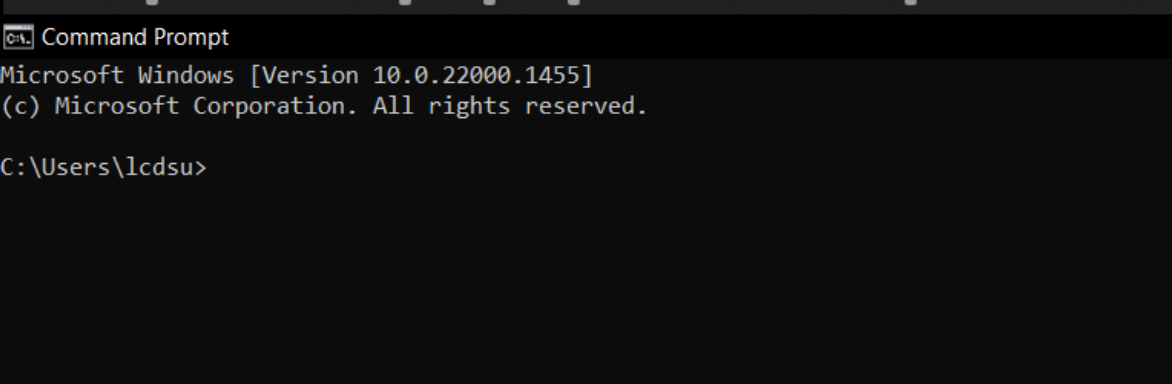
Step 4. Open Command Prompt on your computer by searching for it.
Step 5. If you extracted the file to your downloads folder, type cd Downloads\platform-tools_r33.0.3-windows\platform-tools and press Enter.
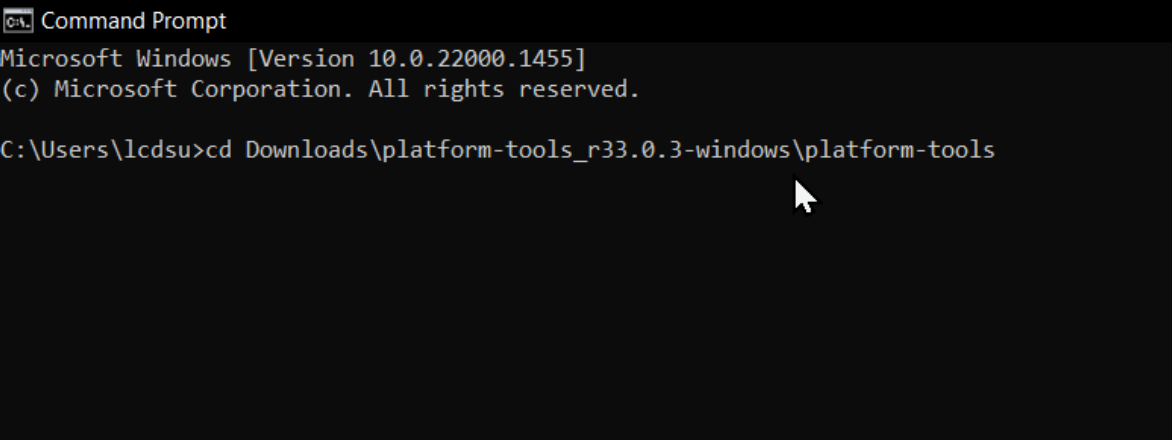
Make sure you cd to the location where you extracted the SDK Platform Tools.
Step 6. This moves you into the platform-tools folder. Type adb.exe and press Enter to open ADB.
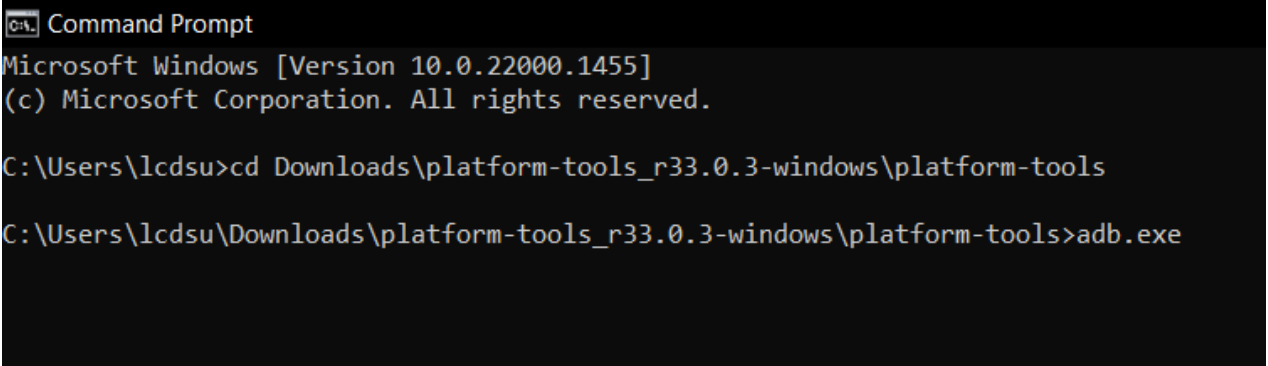
If this worked, lines of text with instructions on using ADB fill the Command Prompt window.
Step 7. Check the device is connected: type adb devices and press Enter. You should see one device listed.

If you don’t see the device, make sure the USB male-to-male cable is connected to both the PC and the device, and that USB OTG and USB debugging are enabled (see section 2).
Step 8. Type adb shell dpm set-device-owner com.procoit.kioskbrowser/.receiver.AdminReceiver and press Enter. If this worked, you will see the following message.

If you enter the command again, you can check that it succeeded.
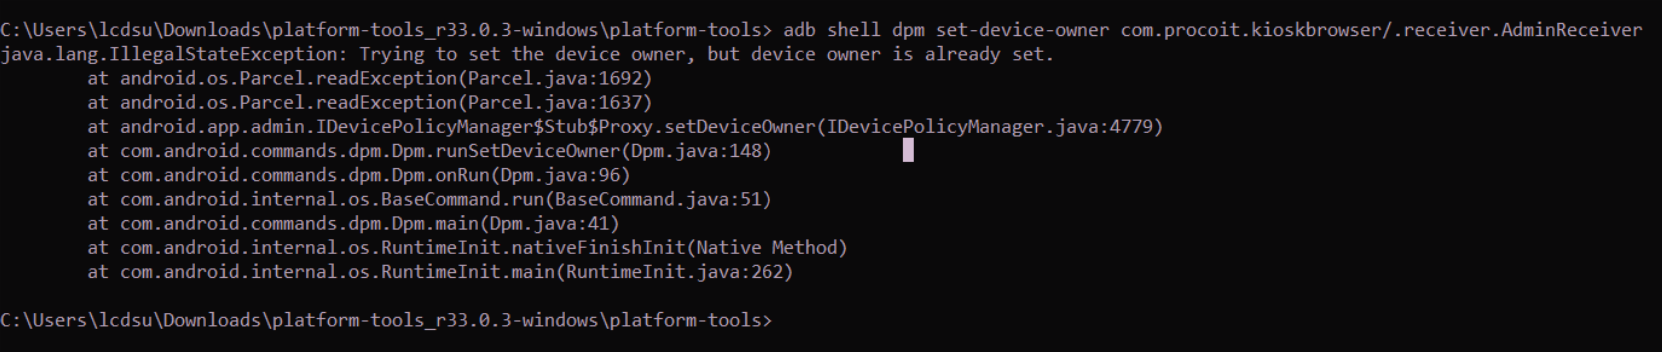
The device now has Kiosk Lockdown Browser as its device owner.
5. Cloudshelf configuration
- Launch the Android Kiosk app, click 'General' → Kiosk URL, and enter device.cloudshelf.ai.
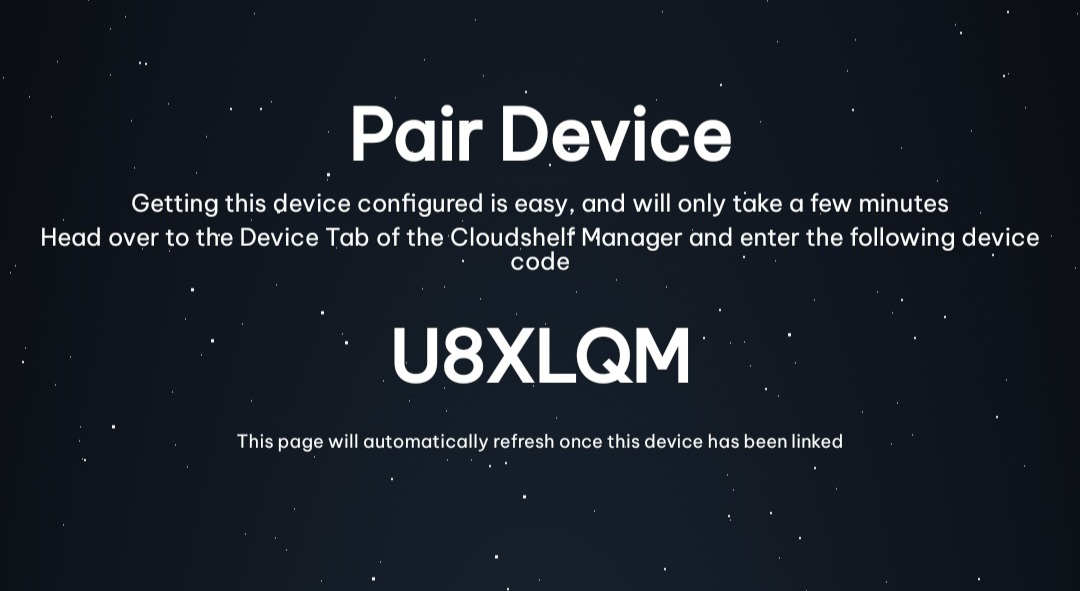
- Save the device URL to the home screen and go to your Shopify admin to pair your device: in the Cloudshelf app, click 'Devices' and select the Cloudshelf you want to display and the location of your device. Or email the pairing code to support@cloudshelf.ai and we will pair the device for you.