
You can run Cloudshelf on screens out of the box, or add software that lets you manage the screens remotely. If you have more than one location, or are not with the screen all the time, we highly recommend this.
If you are running a non-Android device, we recommend Google ChromeOS Flex. Follow the instructions on this page.
For other setup options for Android devices, or setting up your device on a managed network, see the Partner support section of our help centre.
1. Prerequisites: get the devices running ChromeOS Flex
- You need a Google business account. Set one up here: google.com/business
- Your devices need to be running ChromeOS. If they aren't, see: Google's ChromeOS Flex installation guide
2. Add a Cloudshelf Chrome app to your account (see video below)
- Go to Admin → Devices → Chrome → Apps & extensions → Kiosks (admin.google.com/ac/chrome/apps/kiosk).
- In the bottom right corner, click the yellow circle with a + icon, then choose “Add by URL”.
- Enter the URL “device.cloudshelf.ai” and press 'Save'. NB: if you are using our beta platform, use beta.device.cloudshelf.ai.
- Press 'Agree' and wait for the URL box to close.
- You should now see a Cloudshelf row on the page. Click it and a settings panel opens on the right. Make sure these options are enabled (you may need to scroll down):
- Allow app to manage power
- Allow on-screen keyboard
- Enable plug-ins
- Press 'Save' in the top right corner.
- Above the Cloudshelf row, you should see “Auto-launch app” set to None. Change it to 'Cloudshelf' and press 'Save' in the top right corner.
- Go back into the Cloudshelf row settings, scroll down and make sure this option is enabled:
- Enable health monitoring
- Press 'Save' in the top right corner.
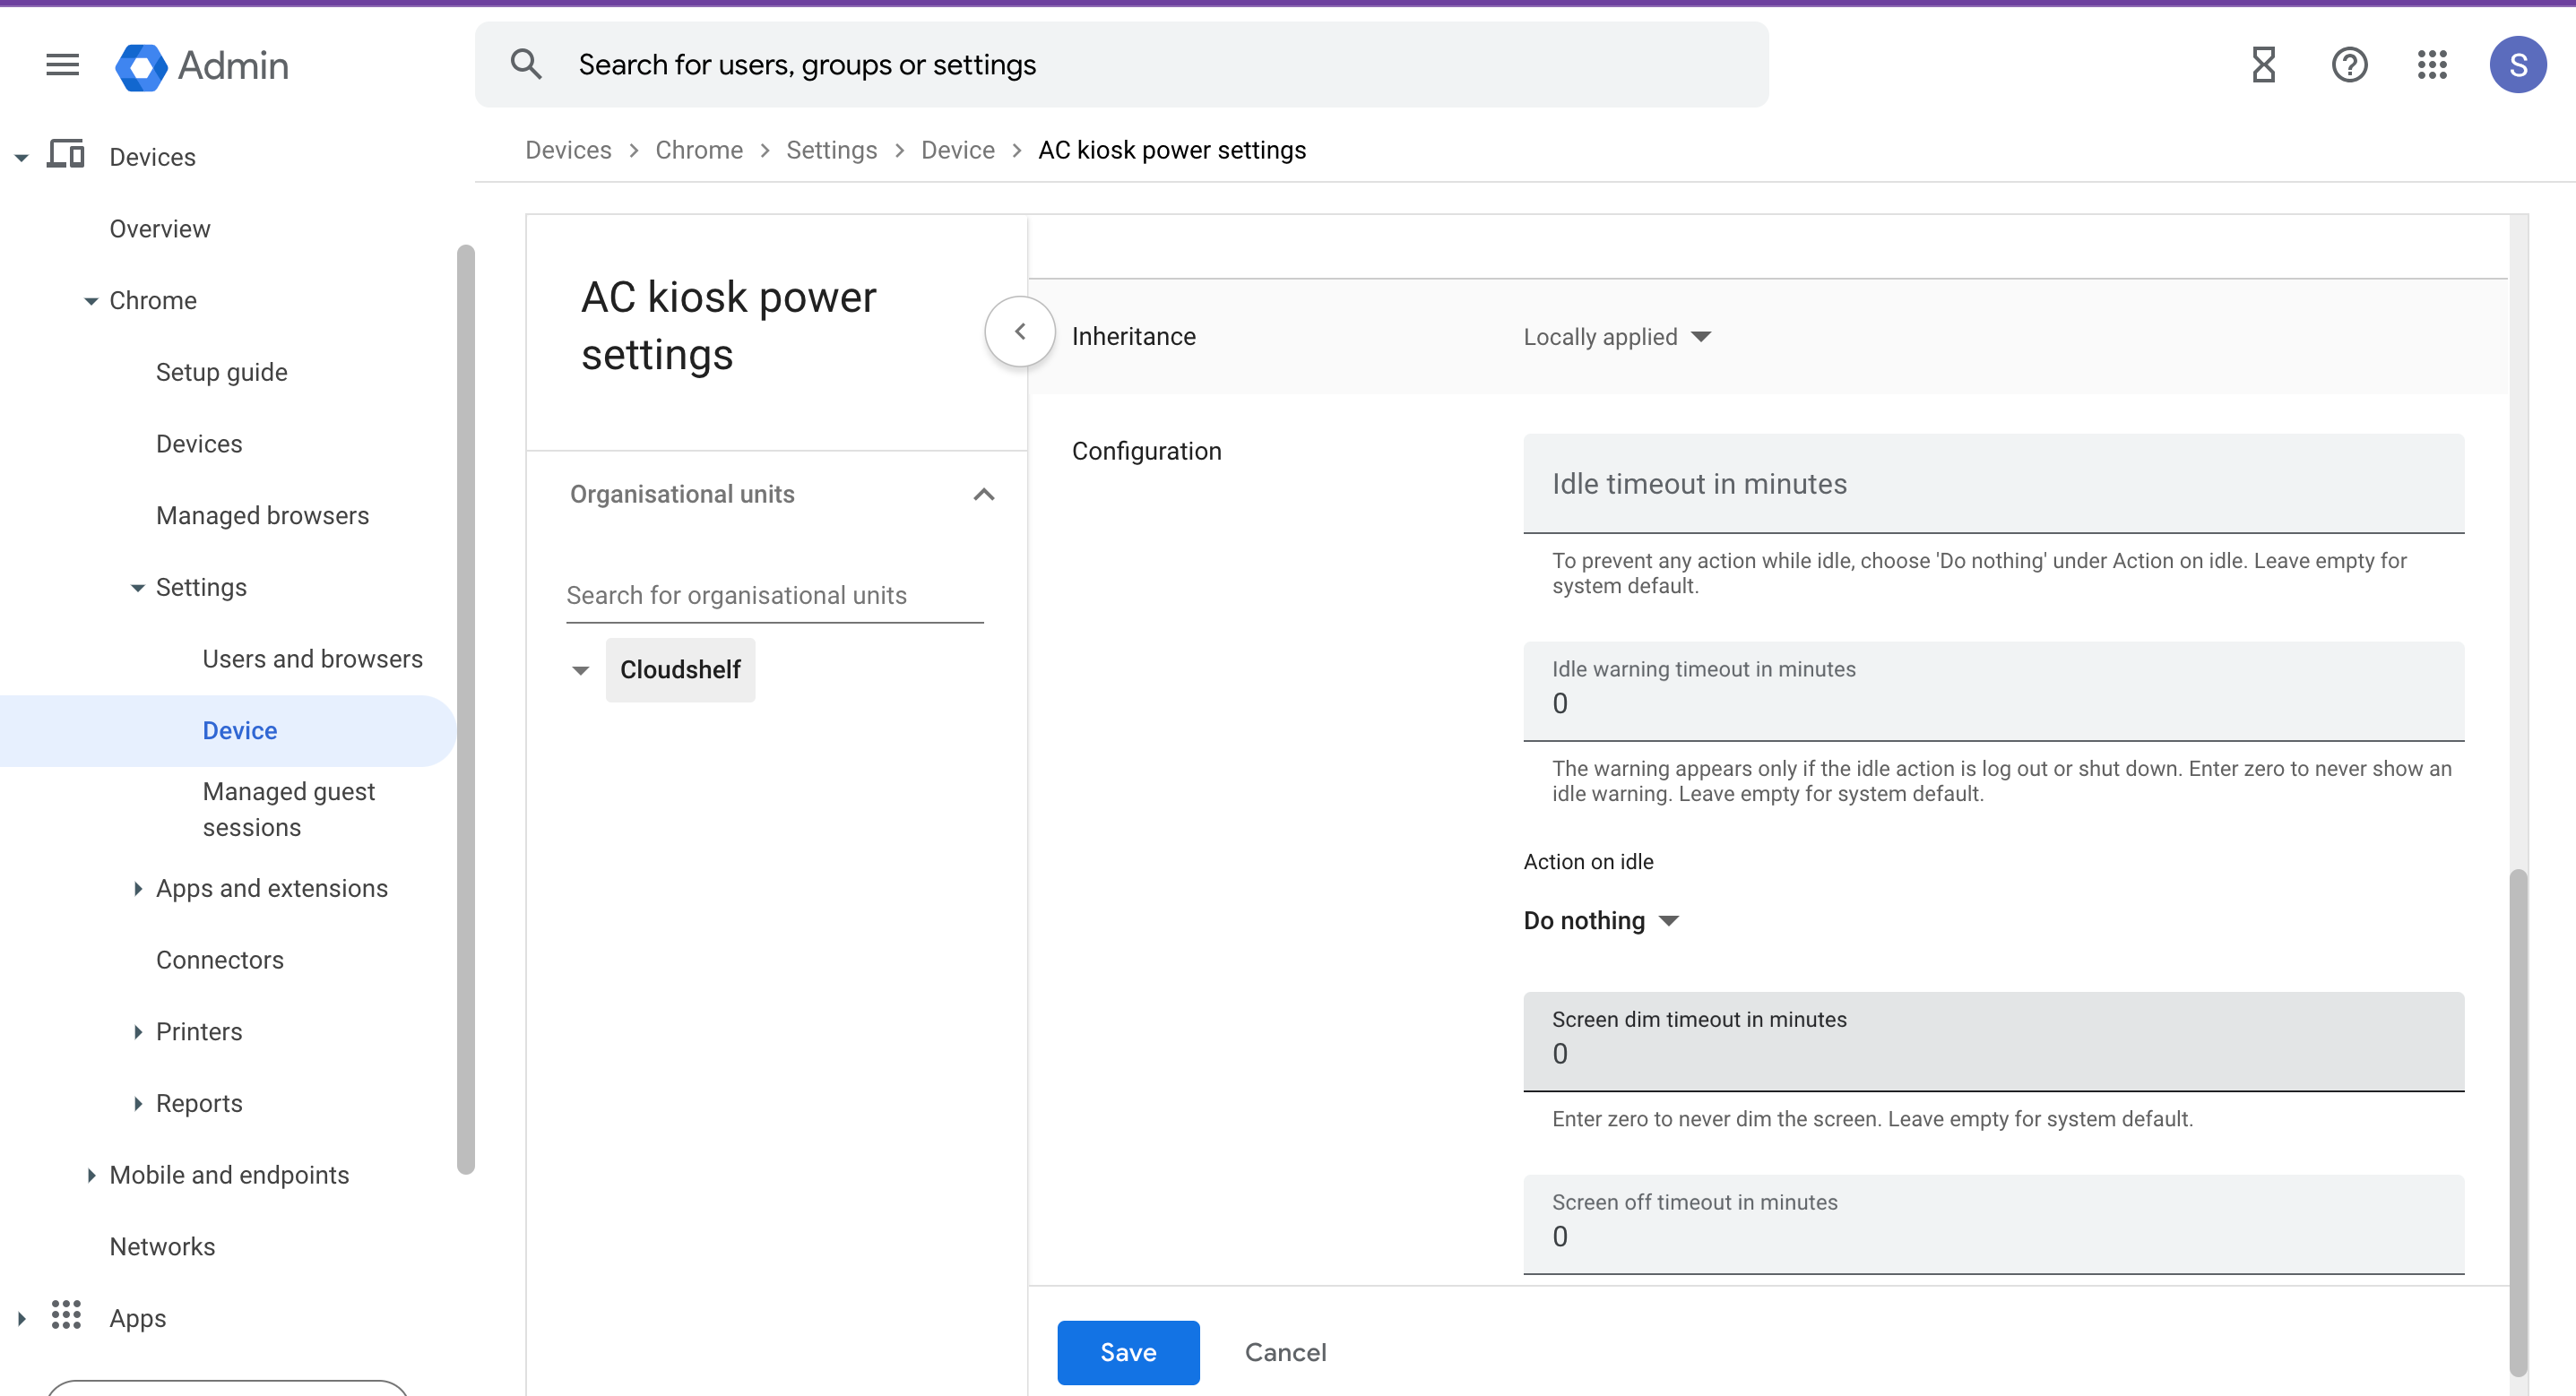
3. Configure AC power settings so the screen stays on while plugged in
- Select Devices → Chrome → Settings → Device → AC power settings
- Change 'Idle warning timeout in minutes' to 0
- Change 'Action on idle' to Do nothing
- Change 'Screen timeout in minutes' to 0
- Change 'Screen off timeout in minutes' to 0
4. Add devices to your Google account so you can monitor them remotely
- Go to Admin → Devices → Chrome → Devices (admin.google.com/ac/chrome/devices)
- Choose to enrol them manually
Google's instructions: enrol ChromeOS devices
Important: once you have enrolled the devices, you MUST restart them (before you pair with Cloudshelf) so they update to the correct settings from the Google Admin panel. This is a Google issue we cannot fix. If you skip it, the device will become “unlinked”.
5. Display Cloudshelf on your devices
- Turn on the device and wait for it to display a 6-digit pairing code.
- In the Cloudshelf app in your Shopify admin, go to the Devices tab → Add device.
- Enter the pairing code.
For more detail on pairing your Cloudshelf devices, see: how to pair your devices (video).
If you need any help with this, contact our support team on support@cloudshelf.ai.